Getting back on with the job
So after my introductory video that I posted last year (see previous post here: https://oldtonewrestorations.com/triumph-tr7-project-is-back-underway/), I’ve been massively busy working on the car.
Things didn’t work out like I planned (when do they ever?); I’d planned to put out a video every month or so to keep up with the progress. But the progress was a bit slow – as bodywork tends to be – and it took ages to get enough material together to create a video. On top of that, I made a decision that I wanted the bodywork done and the TR7 painted before winter set in. A tall order for sure, and that meant no time to waste on videos!
I won’t spoil the later episodes, but suffice to say that a lot of progress has been made; videos and updates should be coming thick and fast now, albeit a few weeks late… but enough of that, on with the progress.
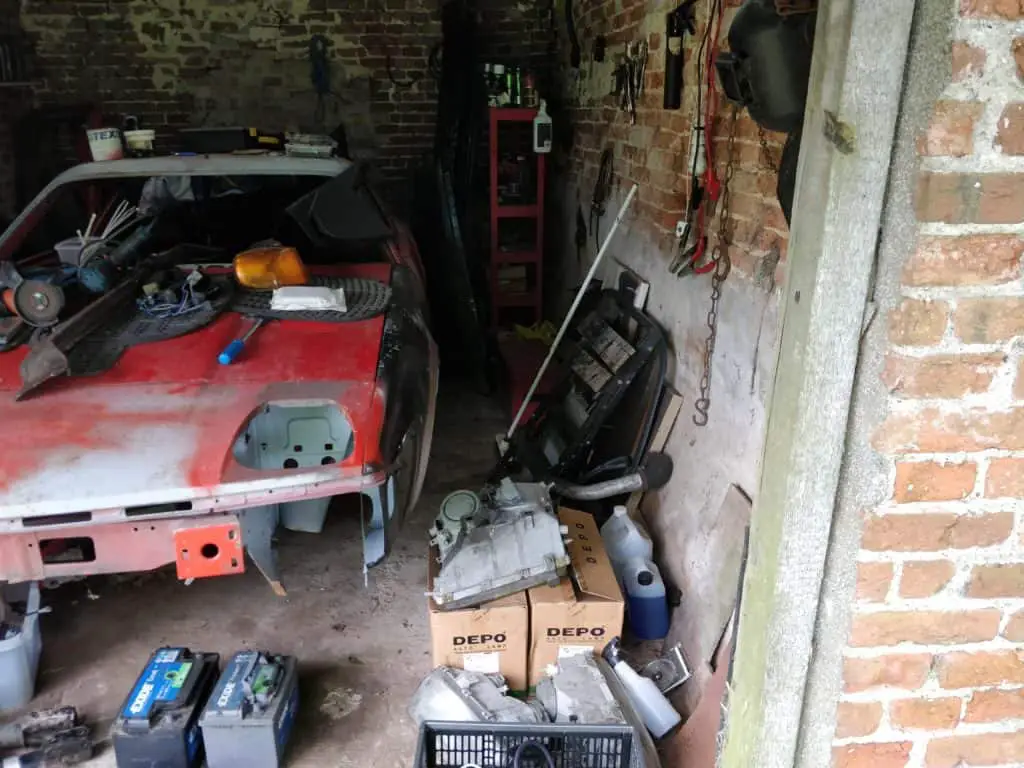
Cleaning out the garage
Although the garage I have now has a lot more space than I’ve ever had before, it’s still not enough. You’d be surprised how much space a car takes up when it’s in bits. That meant a lot of the assorted junk piled up in the garage had to go.
After spending a good day or so moving as much junk out of the way as I could, it was time to get started.
There’s a TR7 in there somewhere! 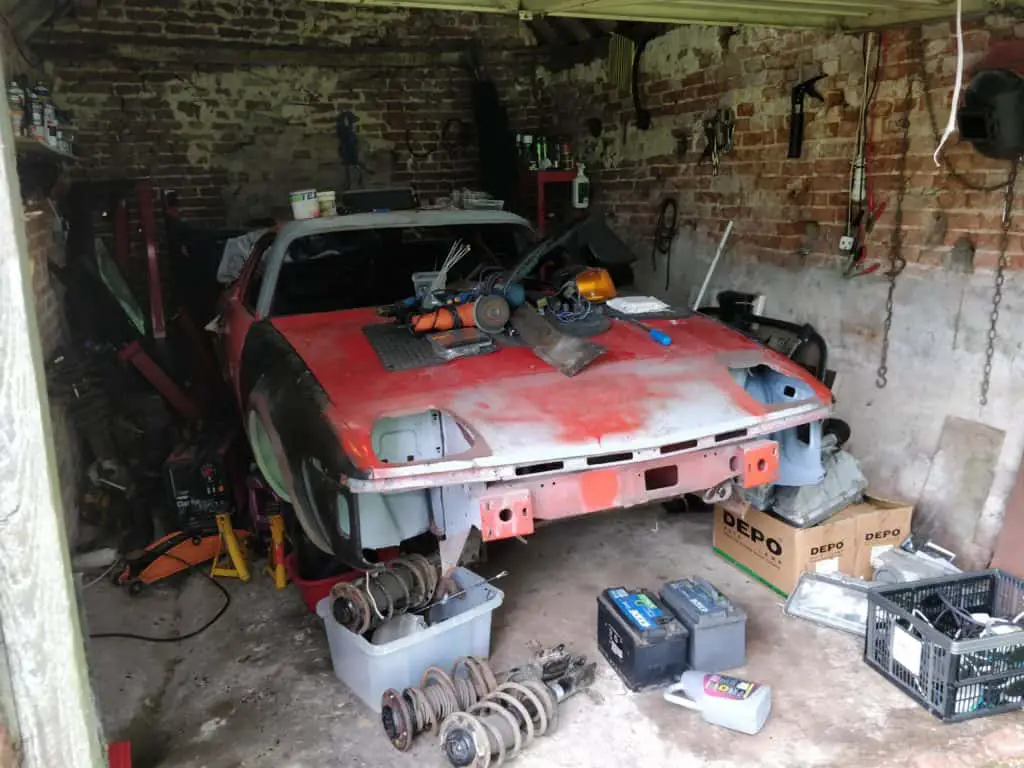
I can’t really work in this… 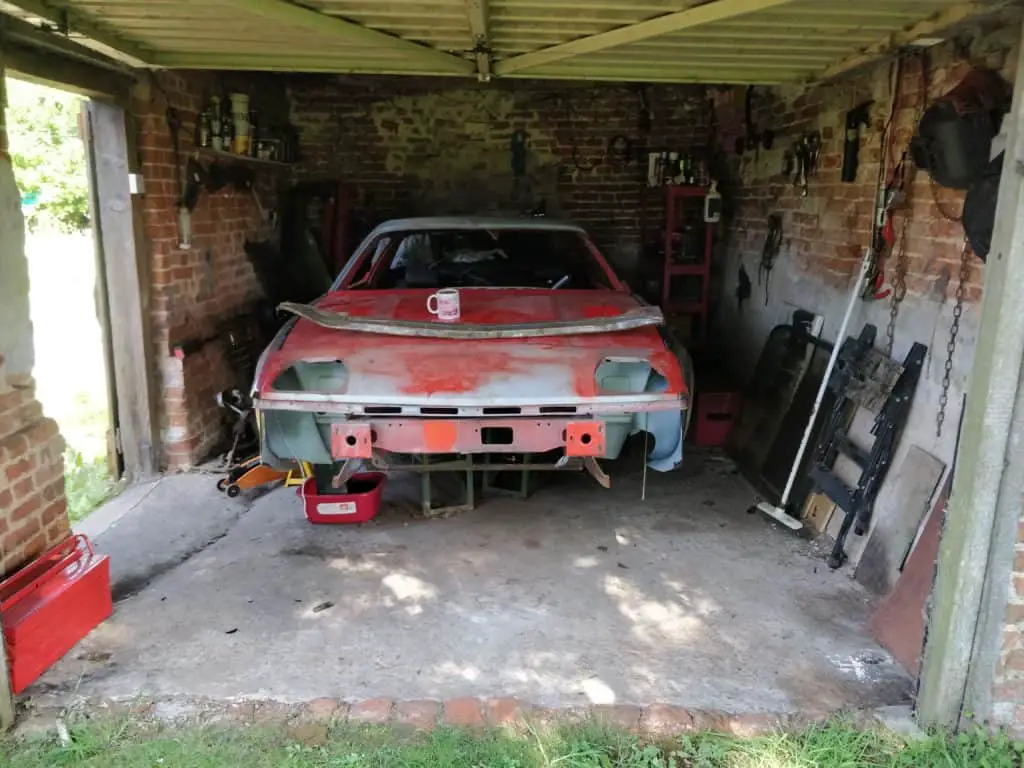
Nice and tidy now. The restoration can get started!
Fixing the rusty wings
When I’d fitted the new wings, I’d made a few dents and spot weld marks around the wheelarches. Stupidly, I’d just left them in bare metal (likely planning to come back to finish up with some primer), so they’d predictably rusted in those areas.
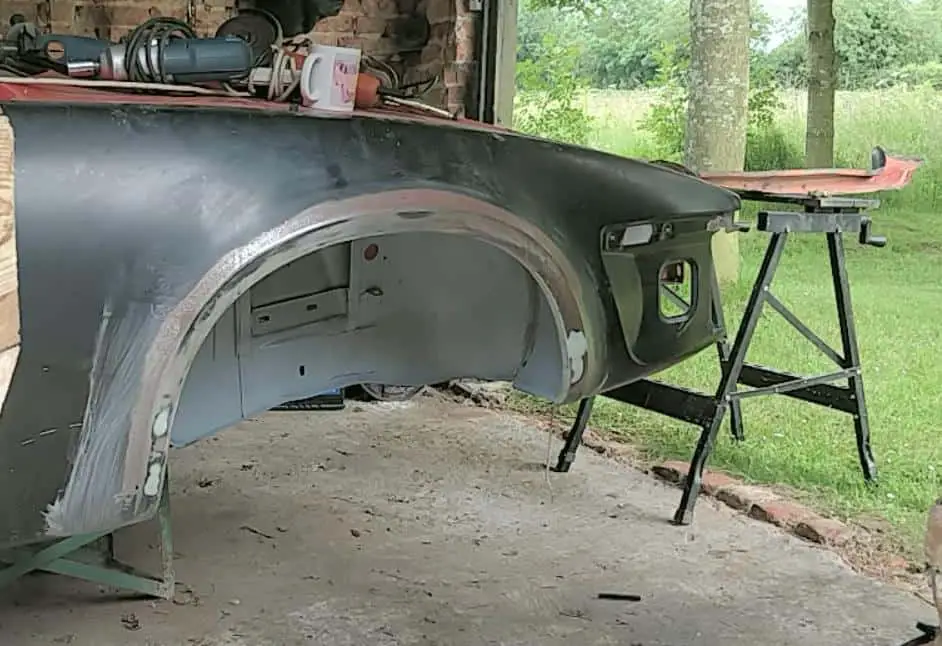
TR7 wheelarch before priming
Nothing bad though, and a couple of hours rubbing the rust back, treating with rust treatment and they were good as new again:
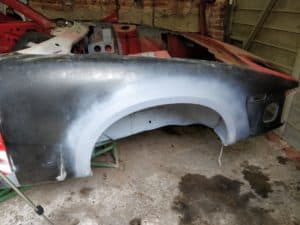
TR7 Wheelarch after priming
A quick coat of grey primer ensured they’d stay rust-free for a while.
Stripping and priming the engine bay
Next on the list, after taking the bonnet off, was the engine bay.
I’d done a lot of work here in the past and everything was solid enough, but the paintwork was a mess and a few areas, such as around the battery tray, had started to rust through after sitting in a damp garage in just primer for so long.
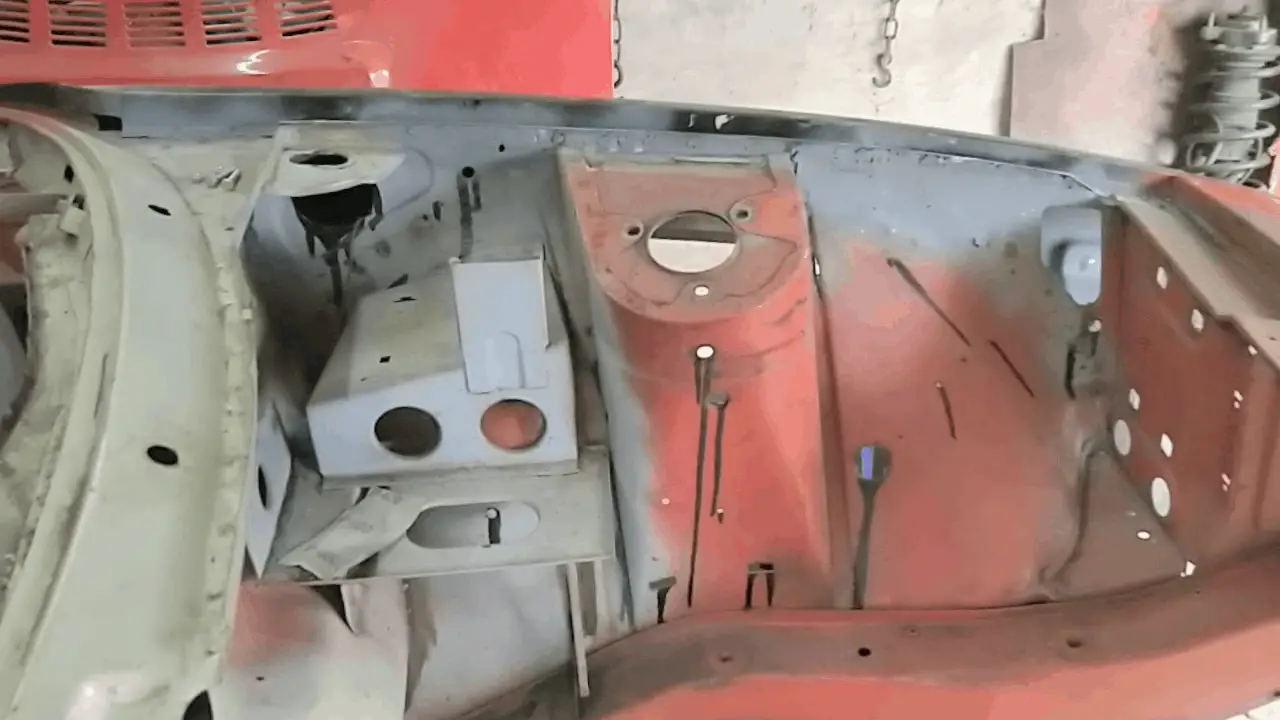
The treatment here was essentially the same as the wings: just plenty of hard work stripping the old paint and primer off, getting rid of all the rust and primer. I spent a little bit of time with some body filler too, just finishing off the patches I’d welded in.
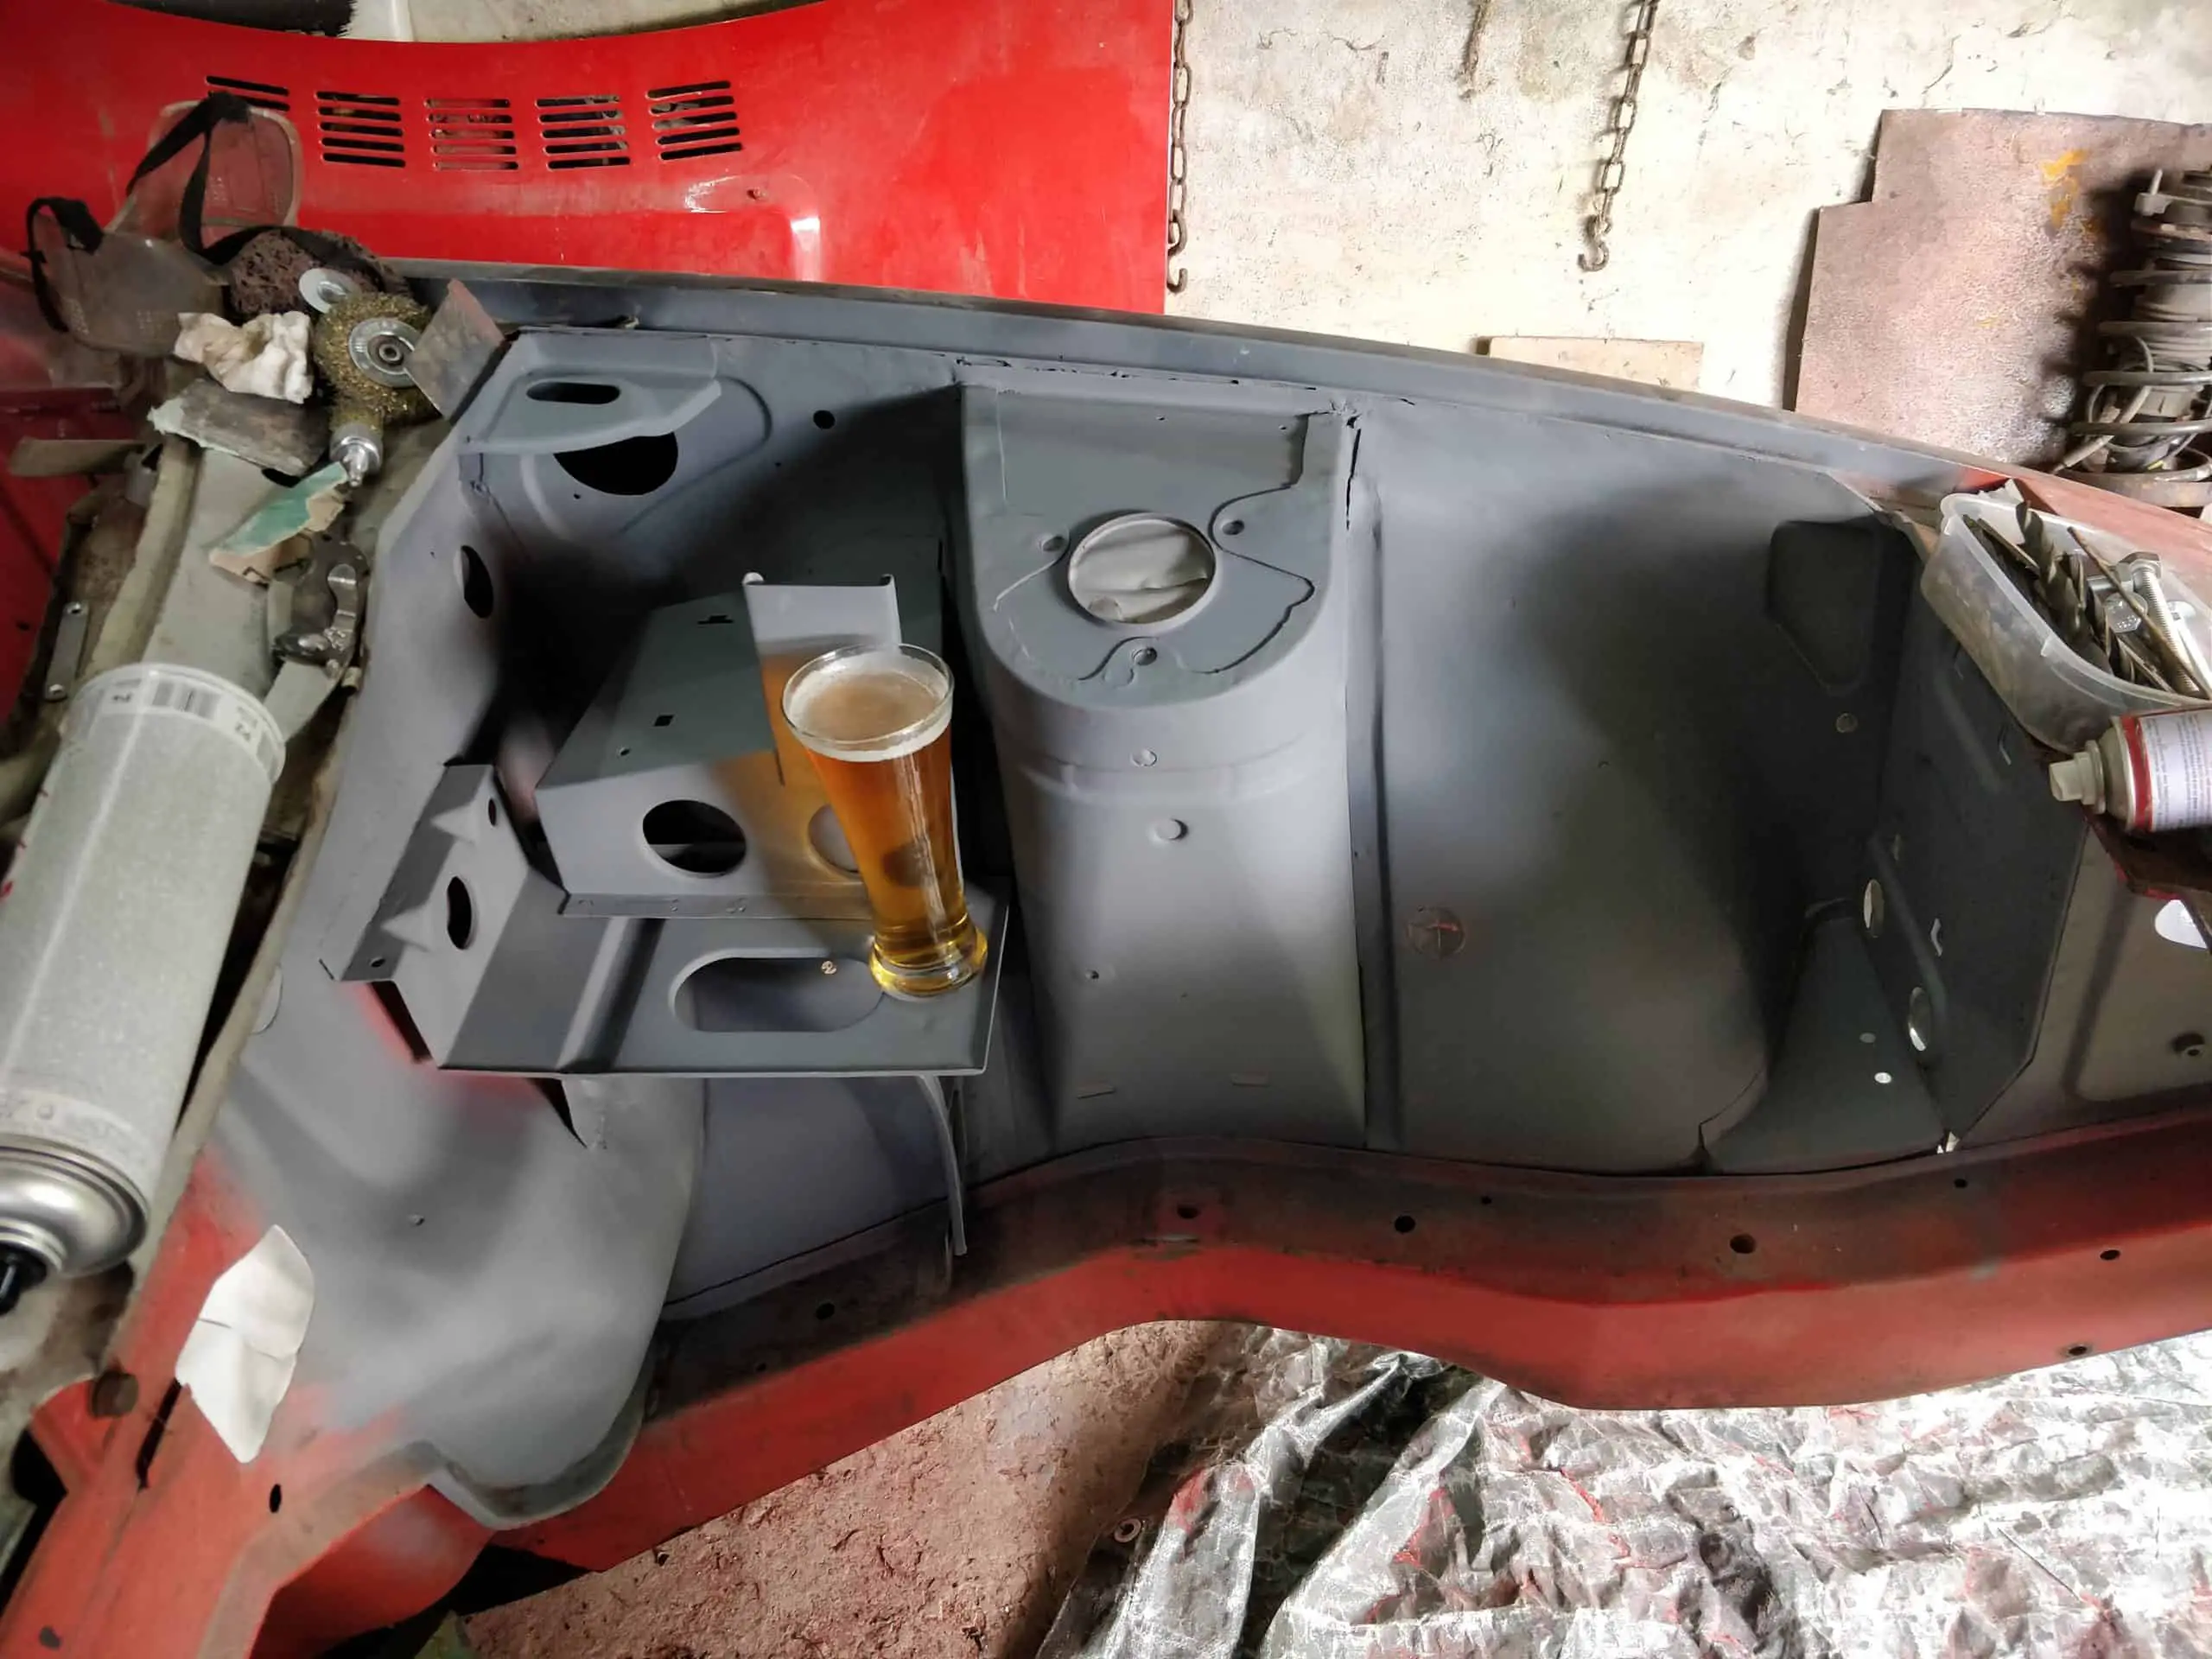
This time around, though, I used an epoxy primer on the finished areas. At this point I didn’t know how long it would be until I got to painting the car, so epoxy primer seemed like a good choice. Unlike the etch primer I’d used in the past, epoxy isn’t porous, so won’t let damp through if it’s left for a while.
Getting serious about paint
I’d been wondering for a while about what to do with the paint. Do I find a paint shop nearby to take the car to? How much prep work do I do myself? Should I prime it with rattle cans?
I did do a bit of calling around, but the numbers were pretty scary (the cheapest quote I could get was £1,000, on the understanding that they’d do nothing for prep, just paint what they were given), so I decided to do it all myself. After all, if I’m going to do all the hard work and get the thing prepped, I might as well go all the way and paint it as well. What could possibly go wrong? ?
So, figuring if I was going to do it myself then I should probably get something approaching the proper equipment rather than just doing it all with aerosols, I splashed out on the biggest compressor I could afford, plus all the paint guns and everything else I’d need.
After a bit of playing about, I prepped the bottom of the windscreen frame as well as the guttering, then got busy with my new toys. I’d love to say it came out great, but honestly… epoxy primer is thick stuff, and I didn’t use nearly enough thinner. The end result looked more like porridge than something I’d want to paint over.
No big deal though; I had a lot of bodywork ahead of me and this would all need flatting back anyway.
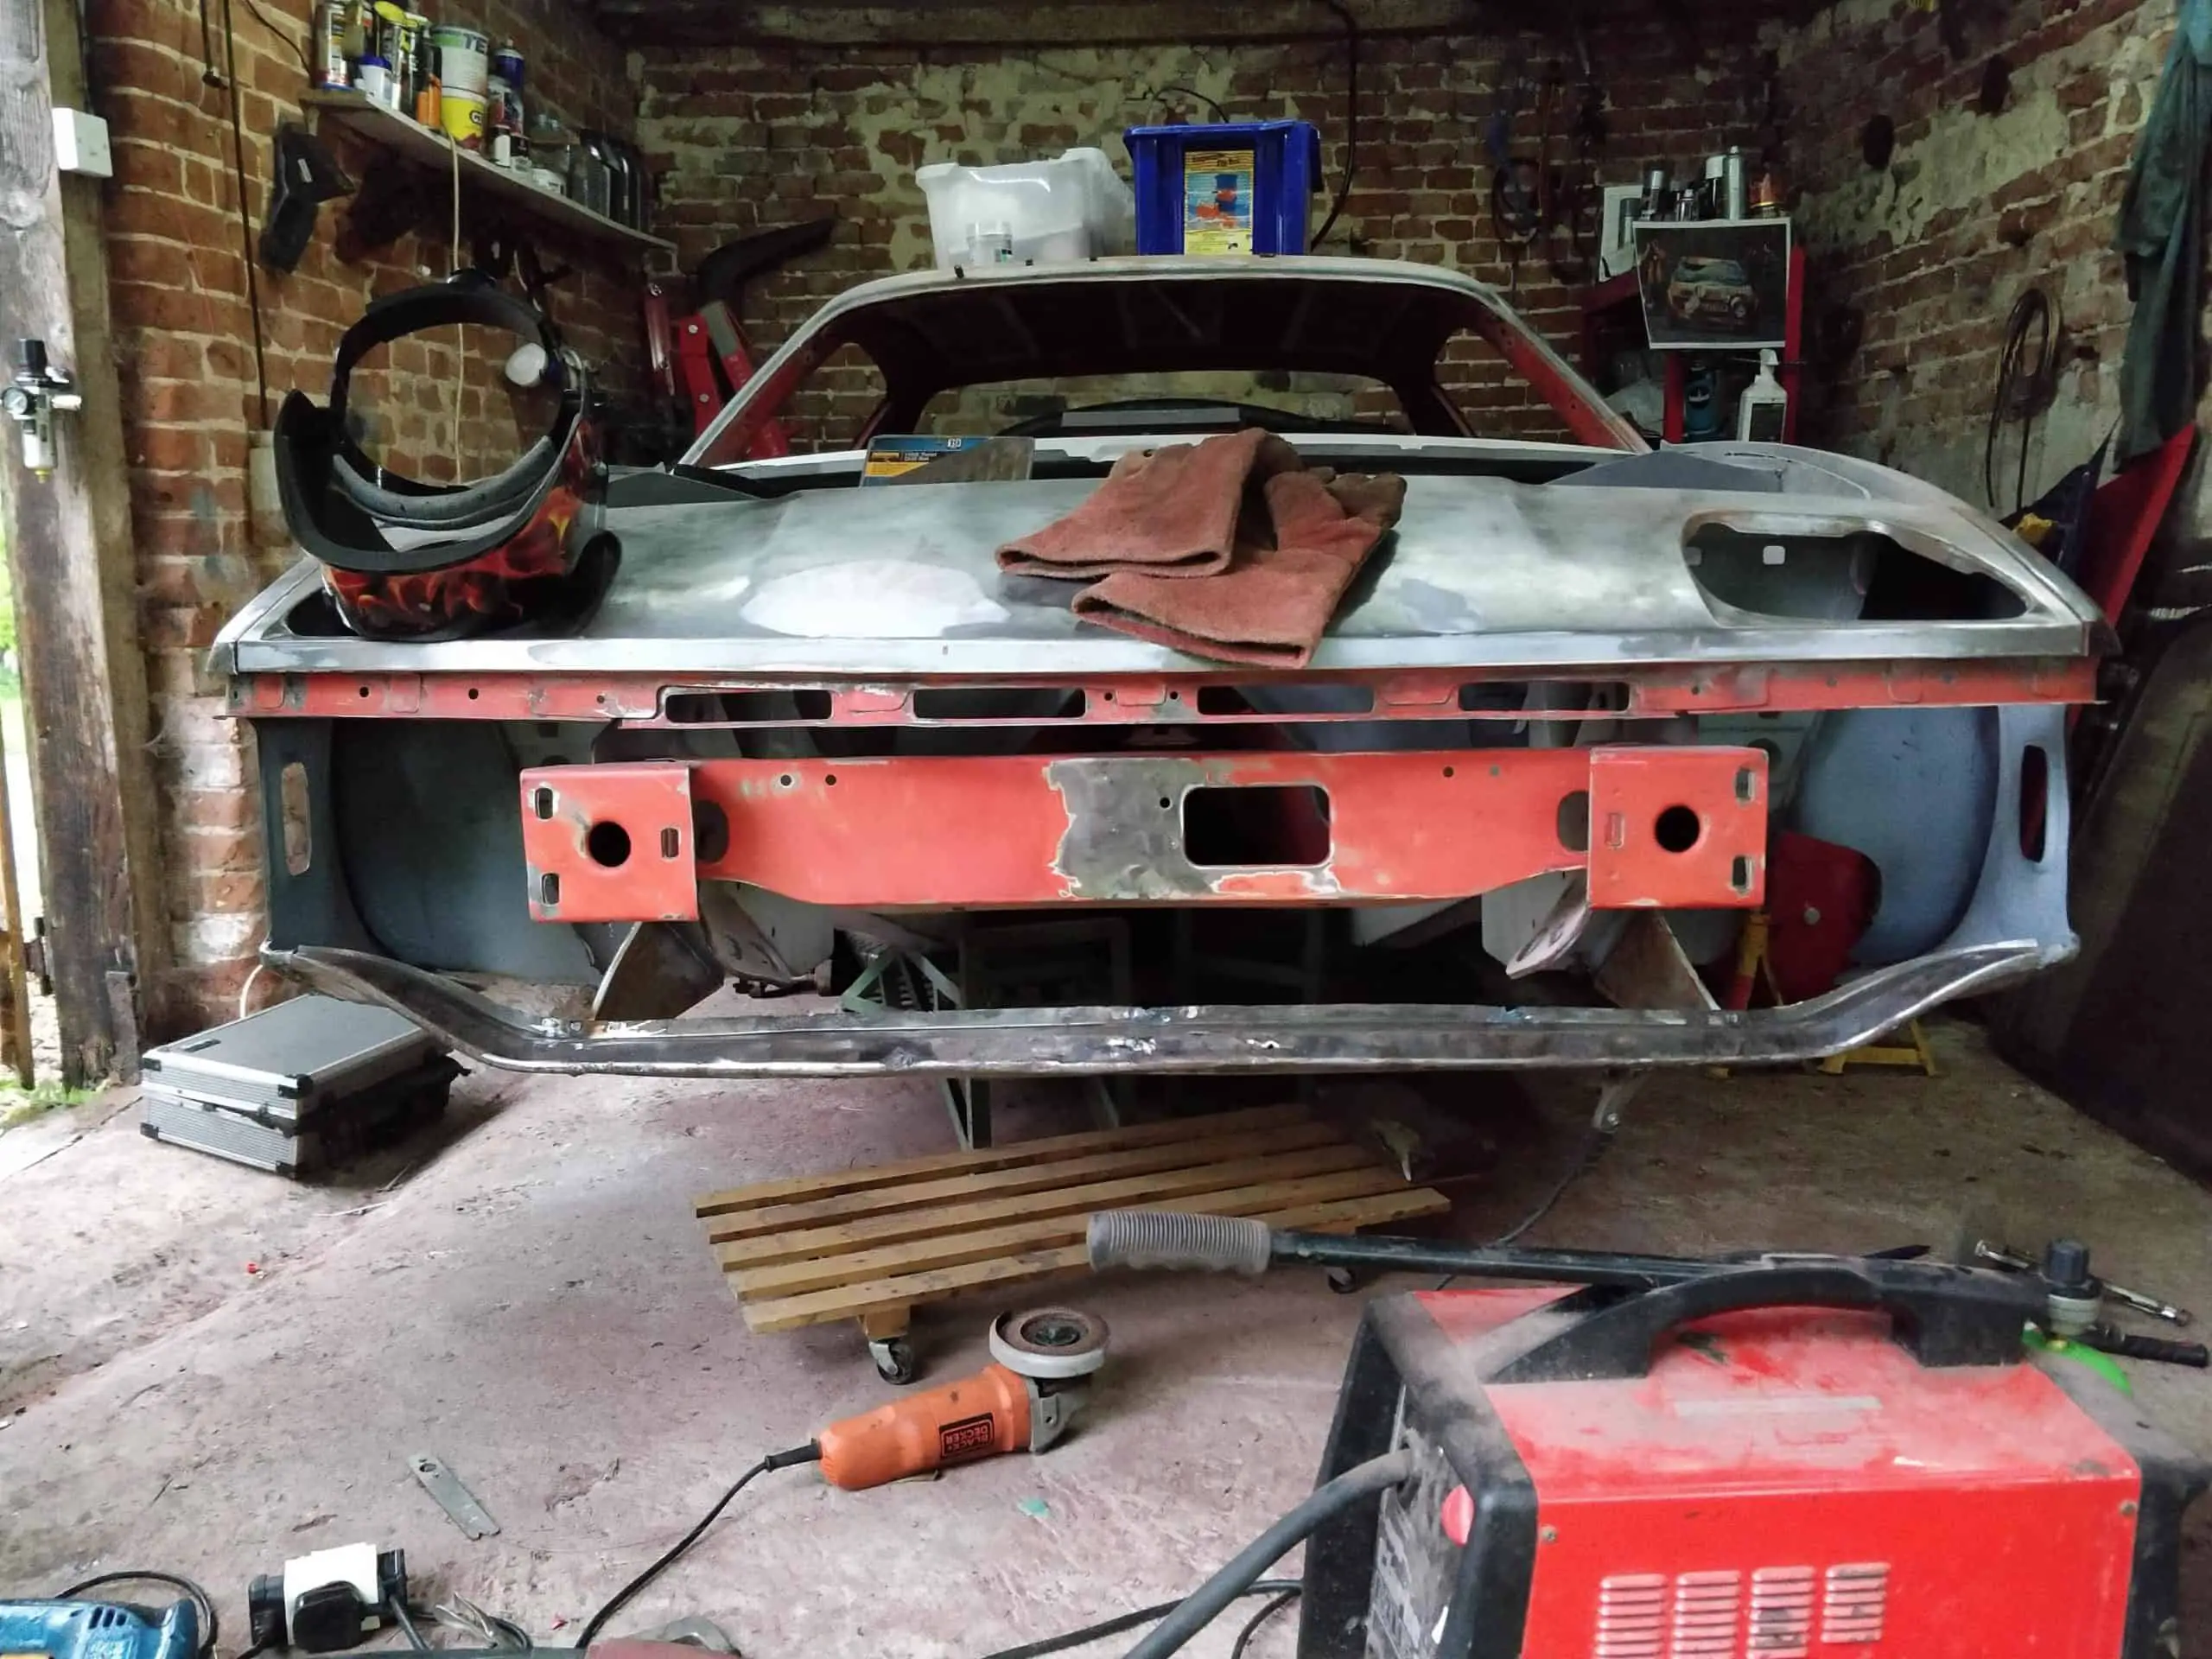
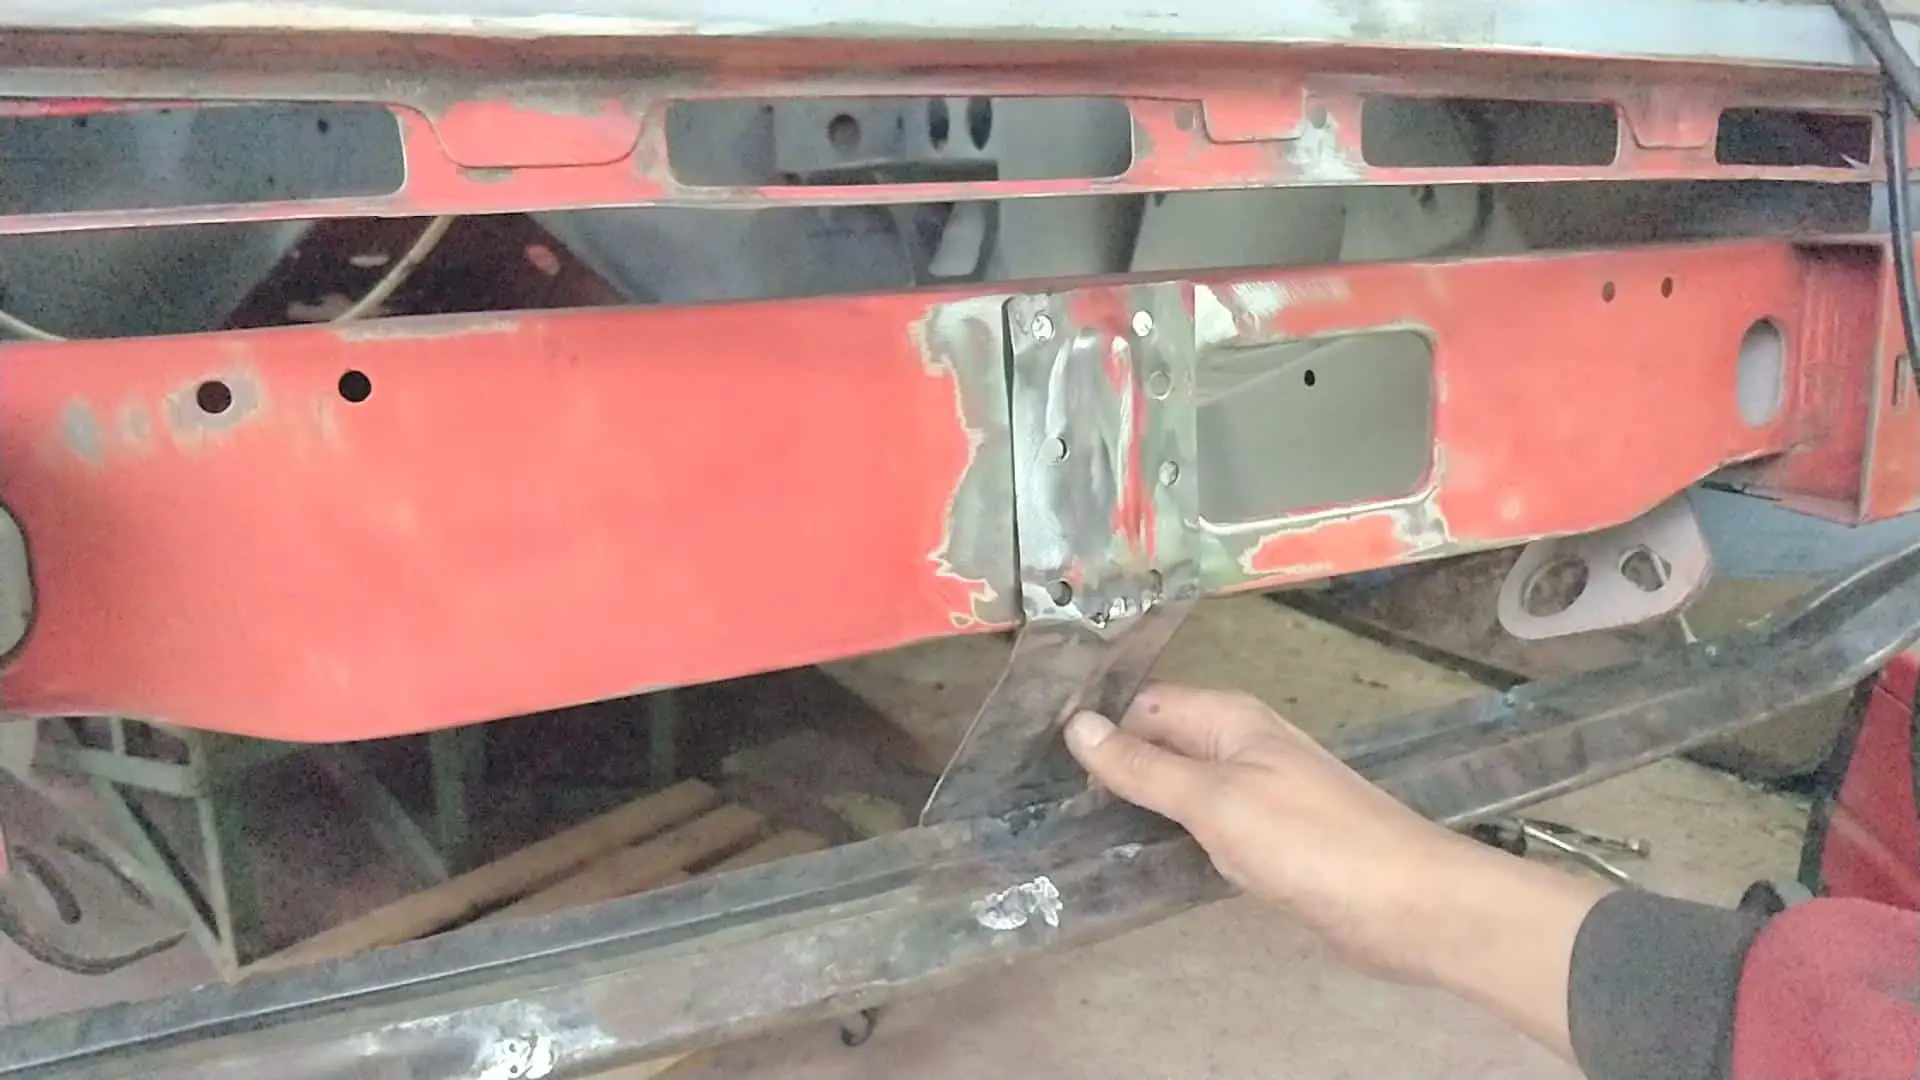
Fitting the front spoiler
Before I could go any further, I needed to refit the front spoiler.
I’ve been working on the spoiler off and on for ages before this; the thing was seriously bent out of shape and caked with filler when I took it off the car. Judging by the state of the spoiler as well as the buckled mounting brackets, it had clearly had its fair share of knocks over the years. So I’ve been taking time here and there to straighten it out as best I could.
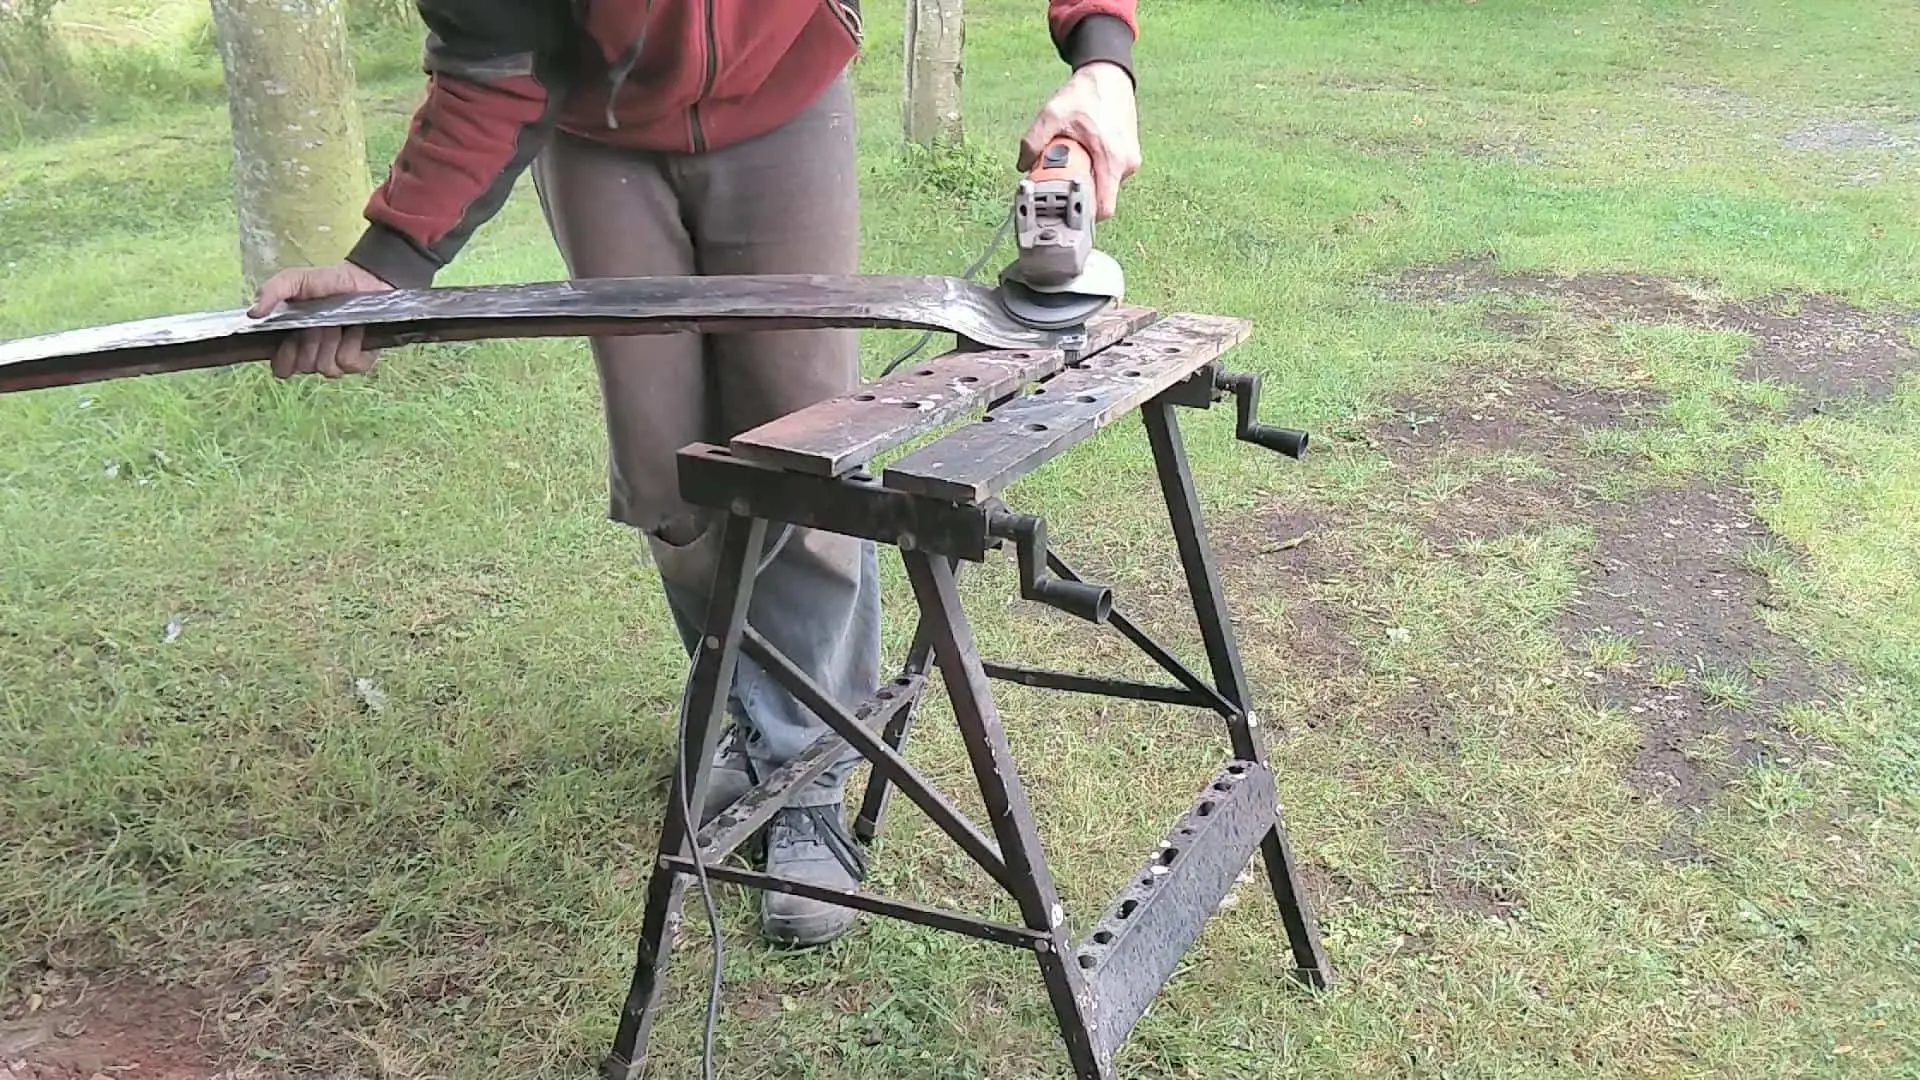
While much better now, it’s still far from perfect, even after all the work I put into it. But Rosie’s never going to be a show car, so I’m calling it good enough.
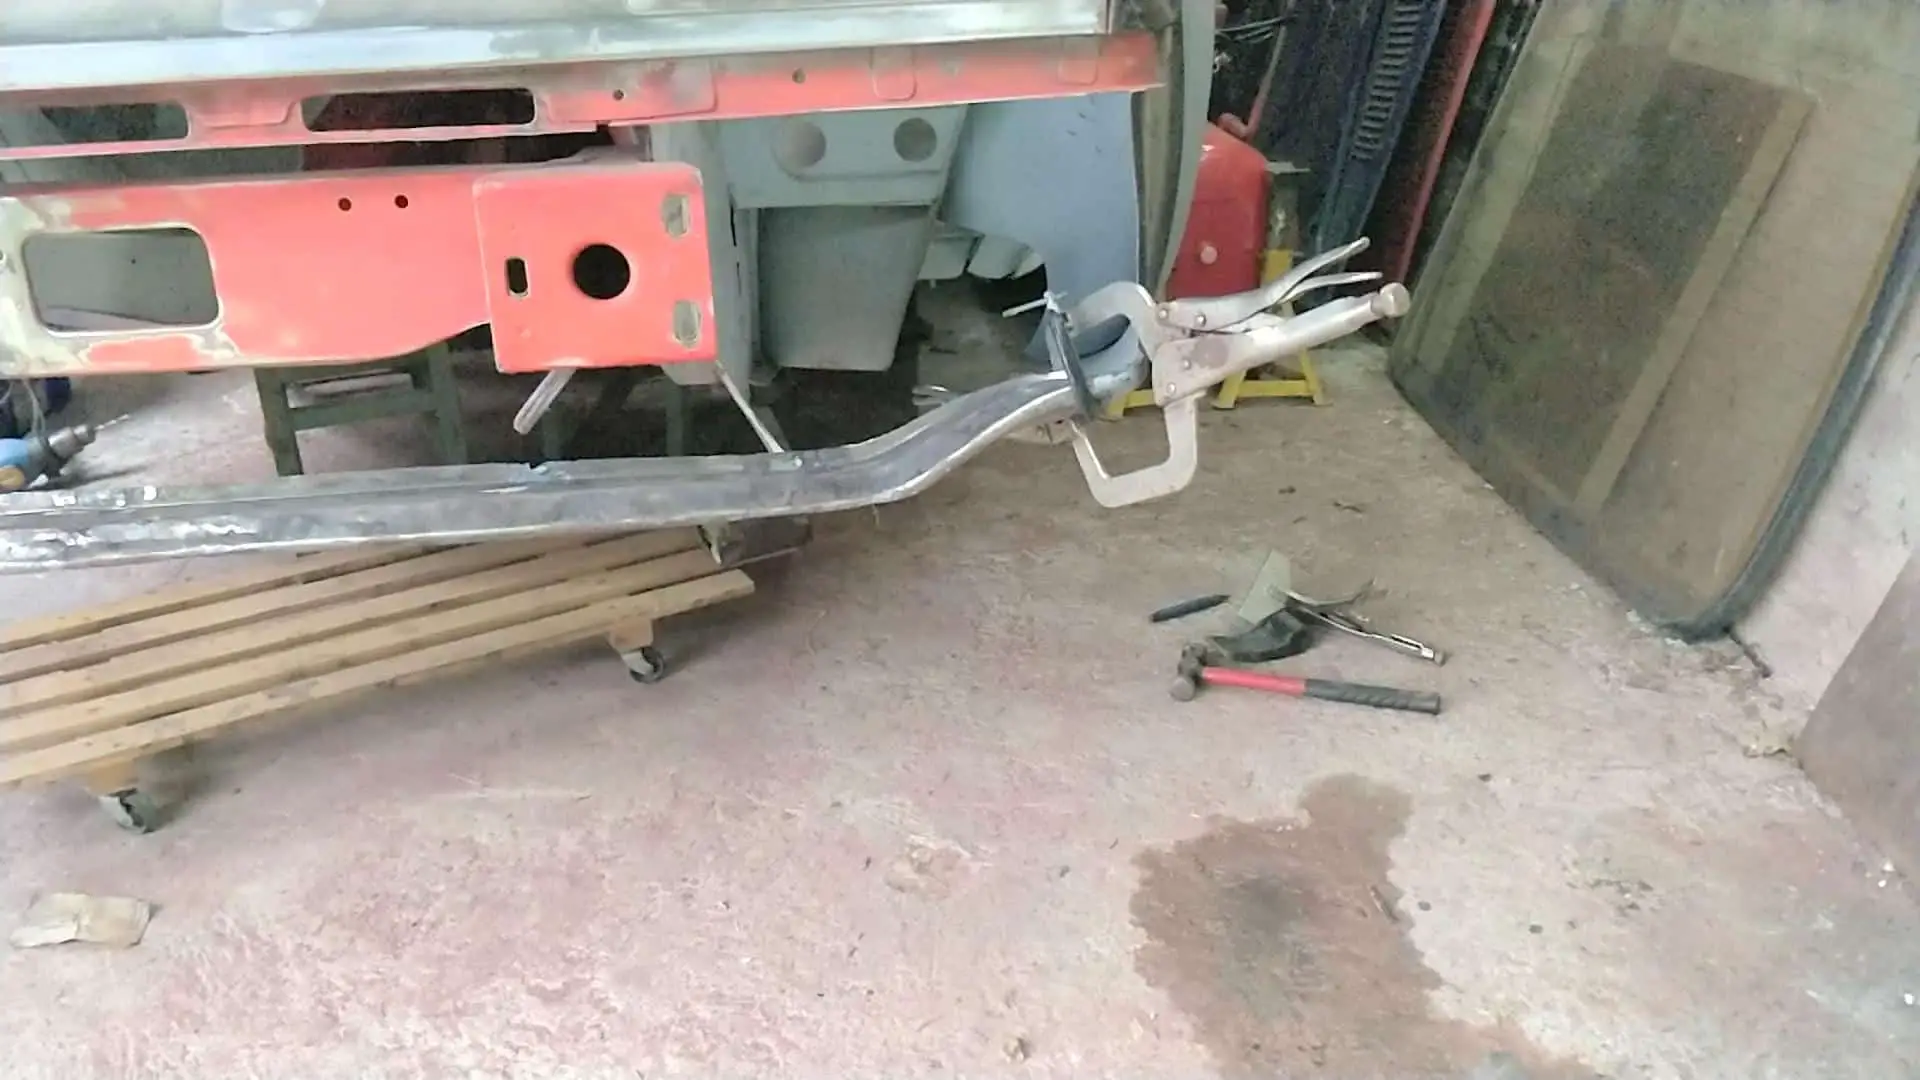
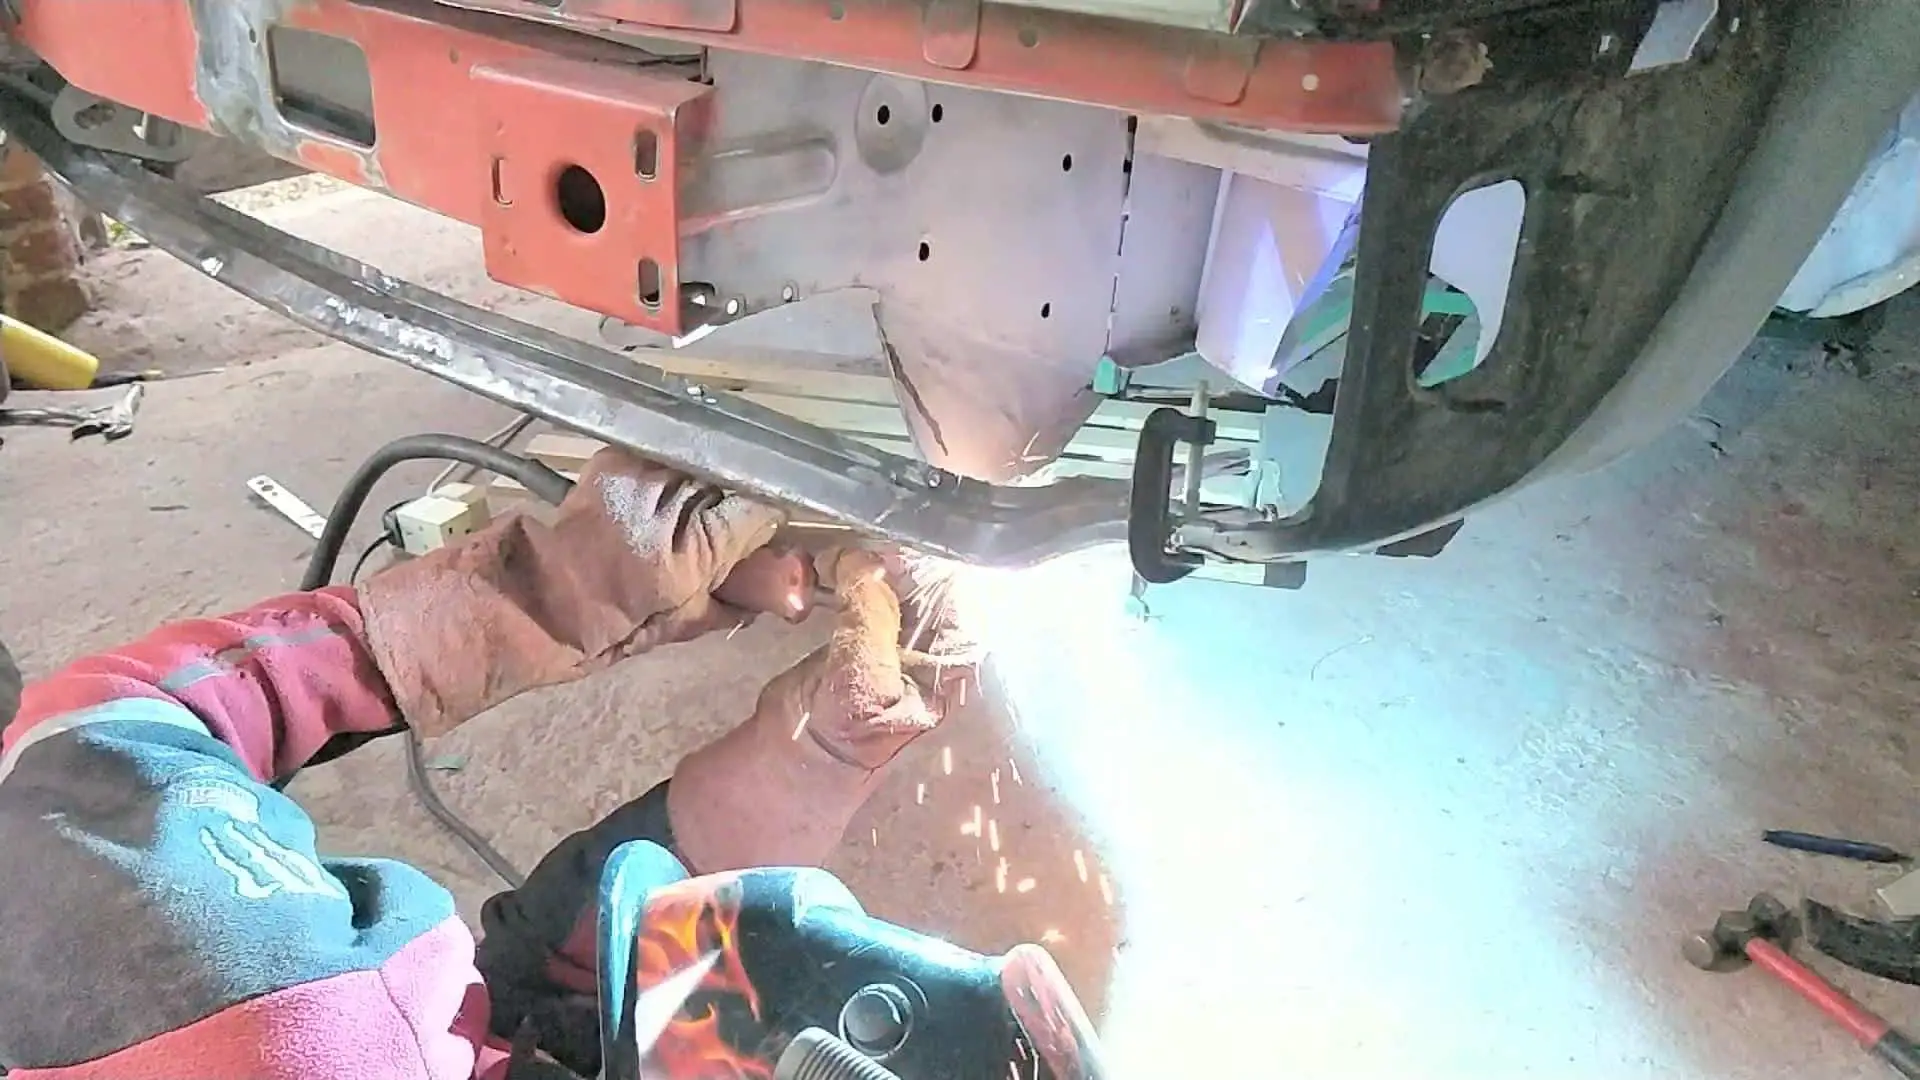
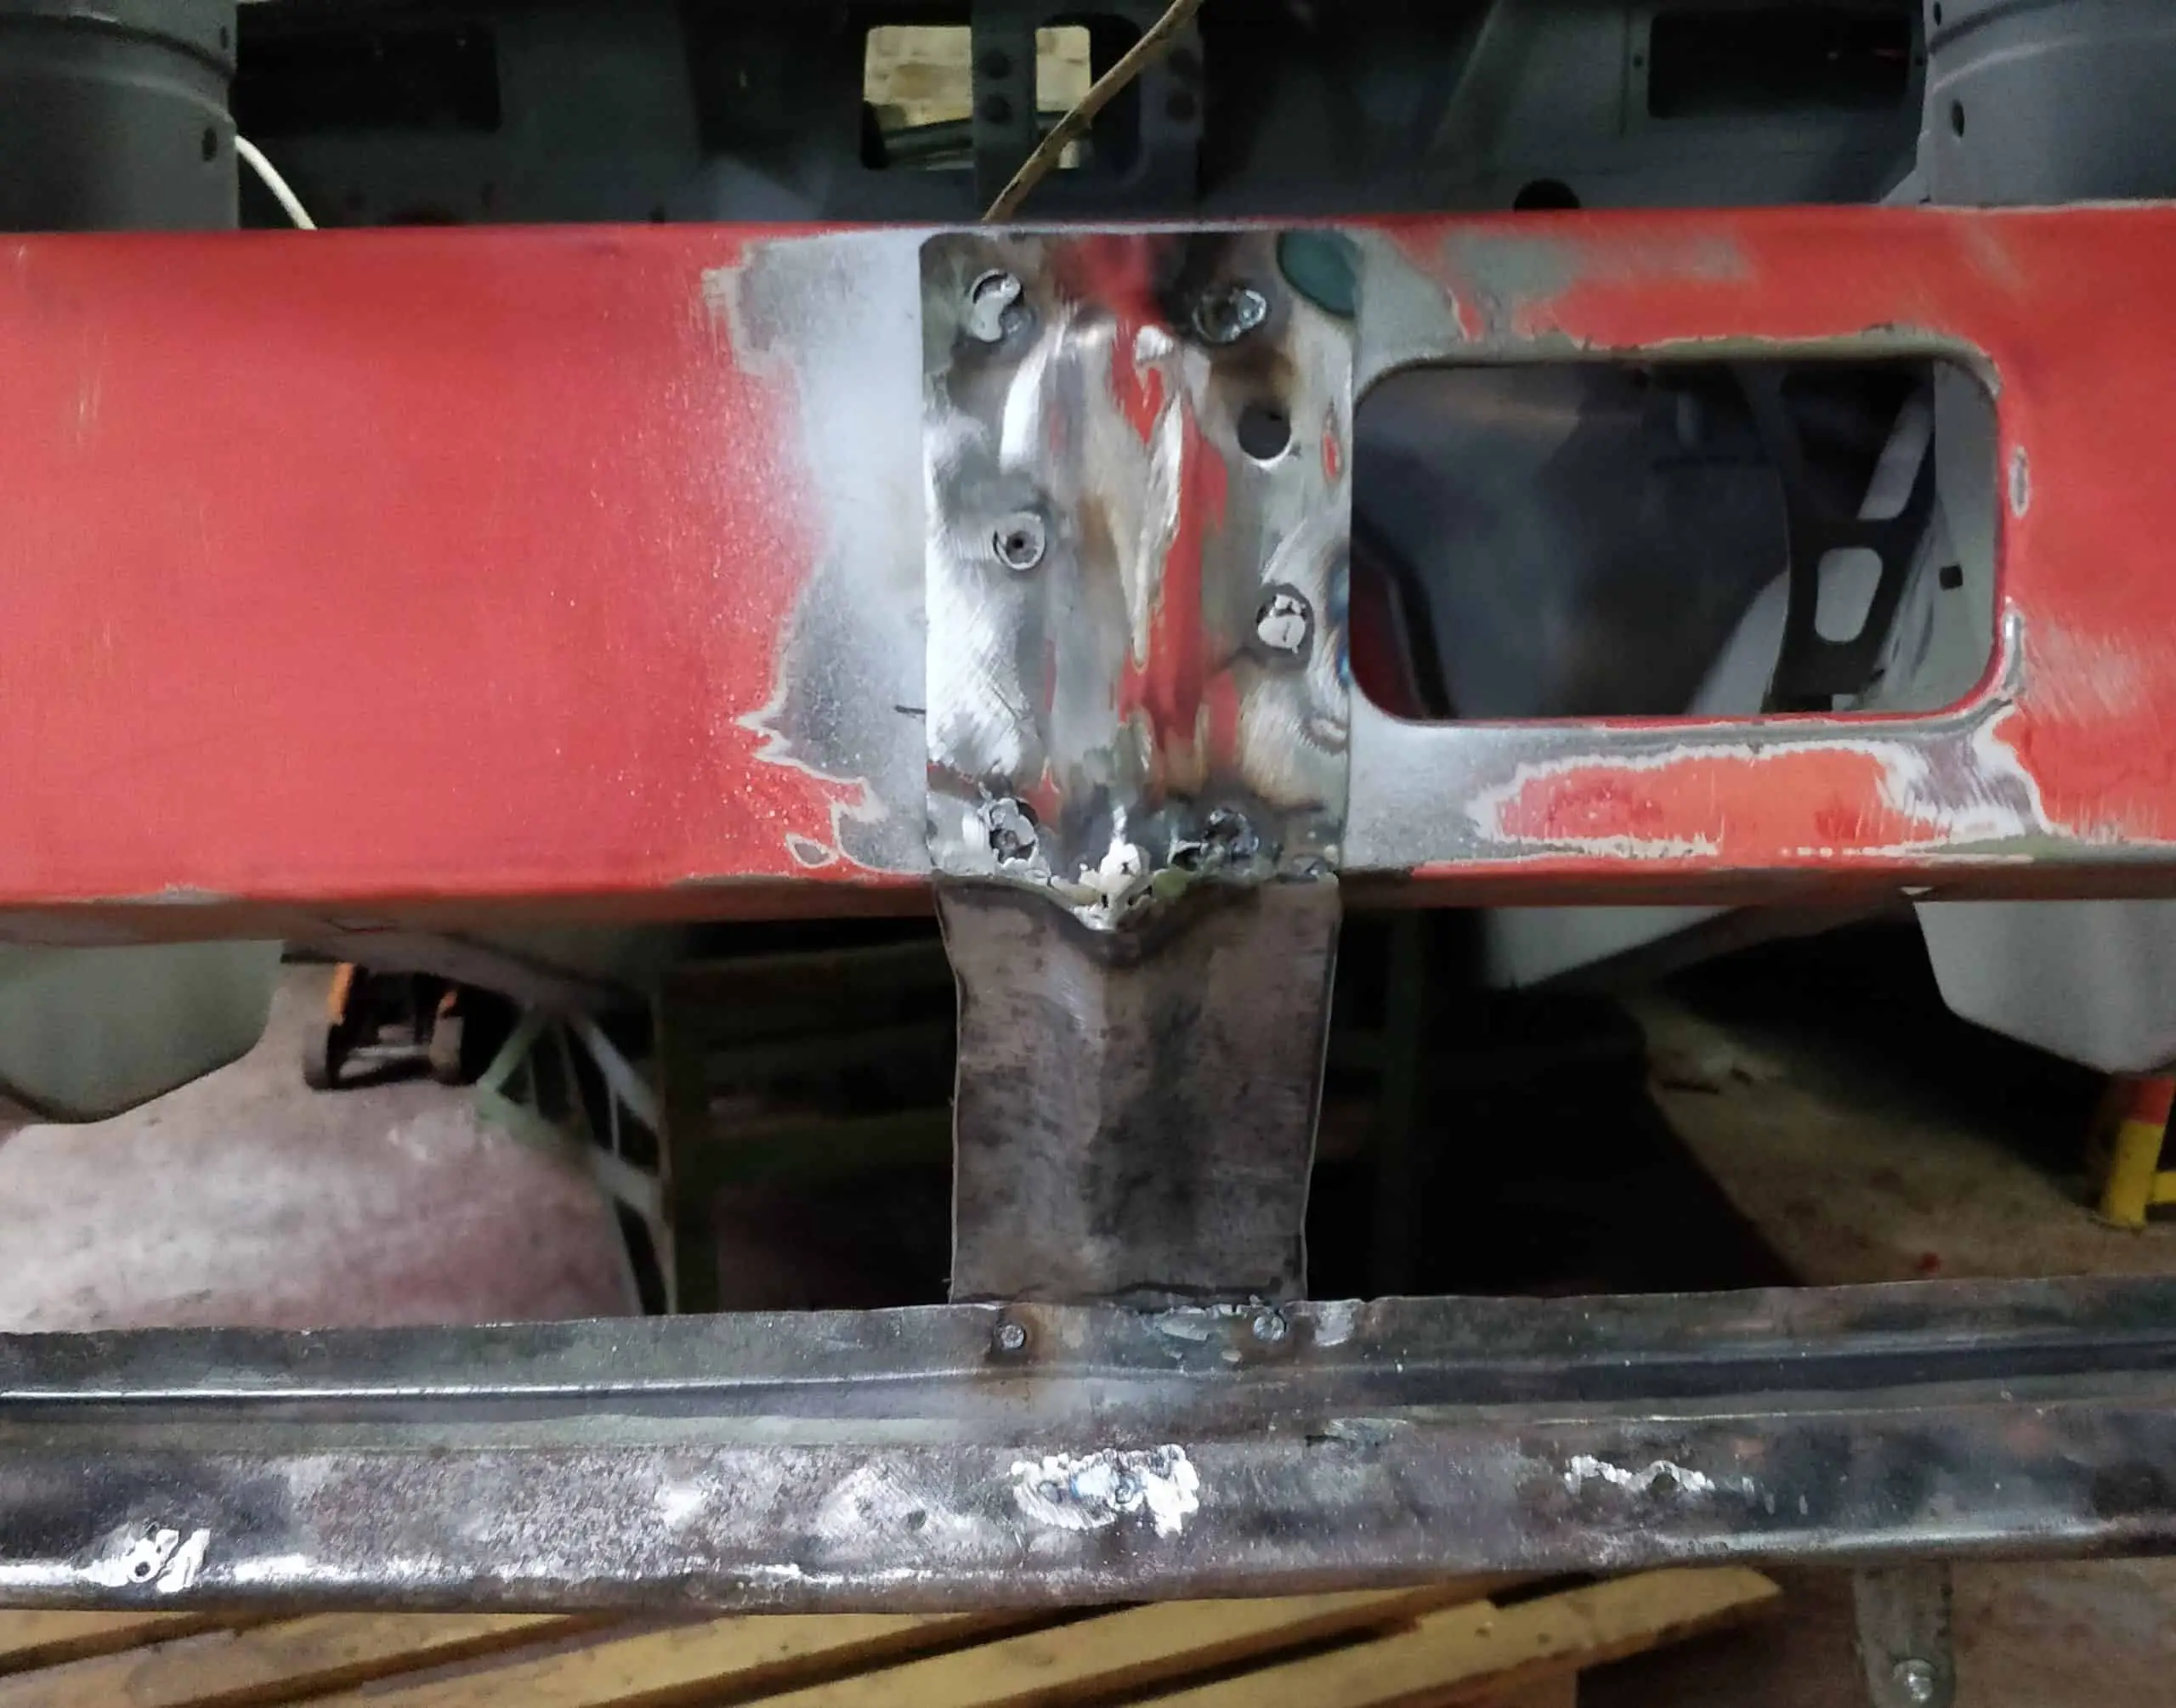
The last job was to make a new support bracket from the remains of the old one (that broke in half when I took the spoiler off; more evidence of accident damage). These aren’t available new, so I fabricated the lower half of the bracket from some scrap steel and welded it to the stub of the original bracket. Again, not perfect but good enough for me.
Final prep
With the spoiler welded in place, I was now ready to get the rest of the front end prepped for the primer.
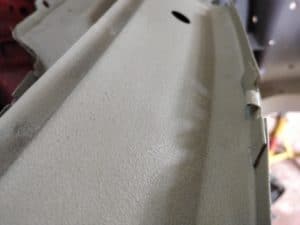
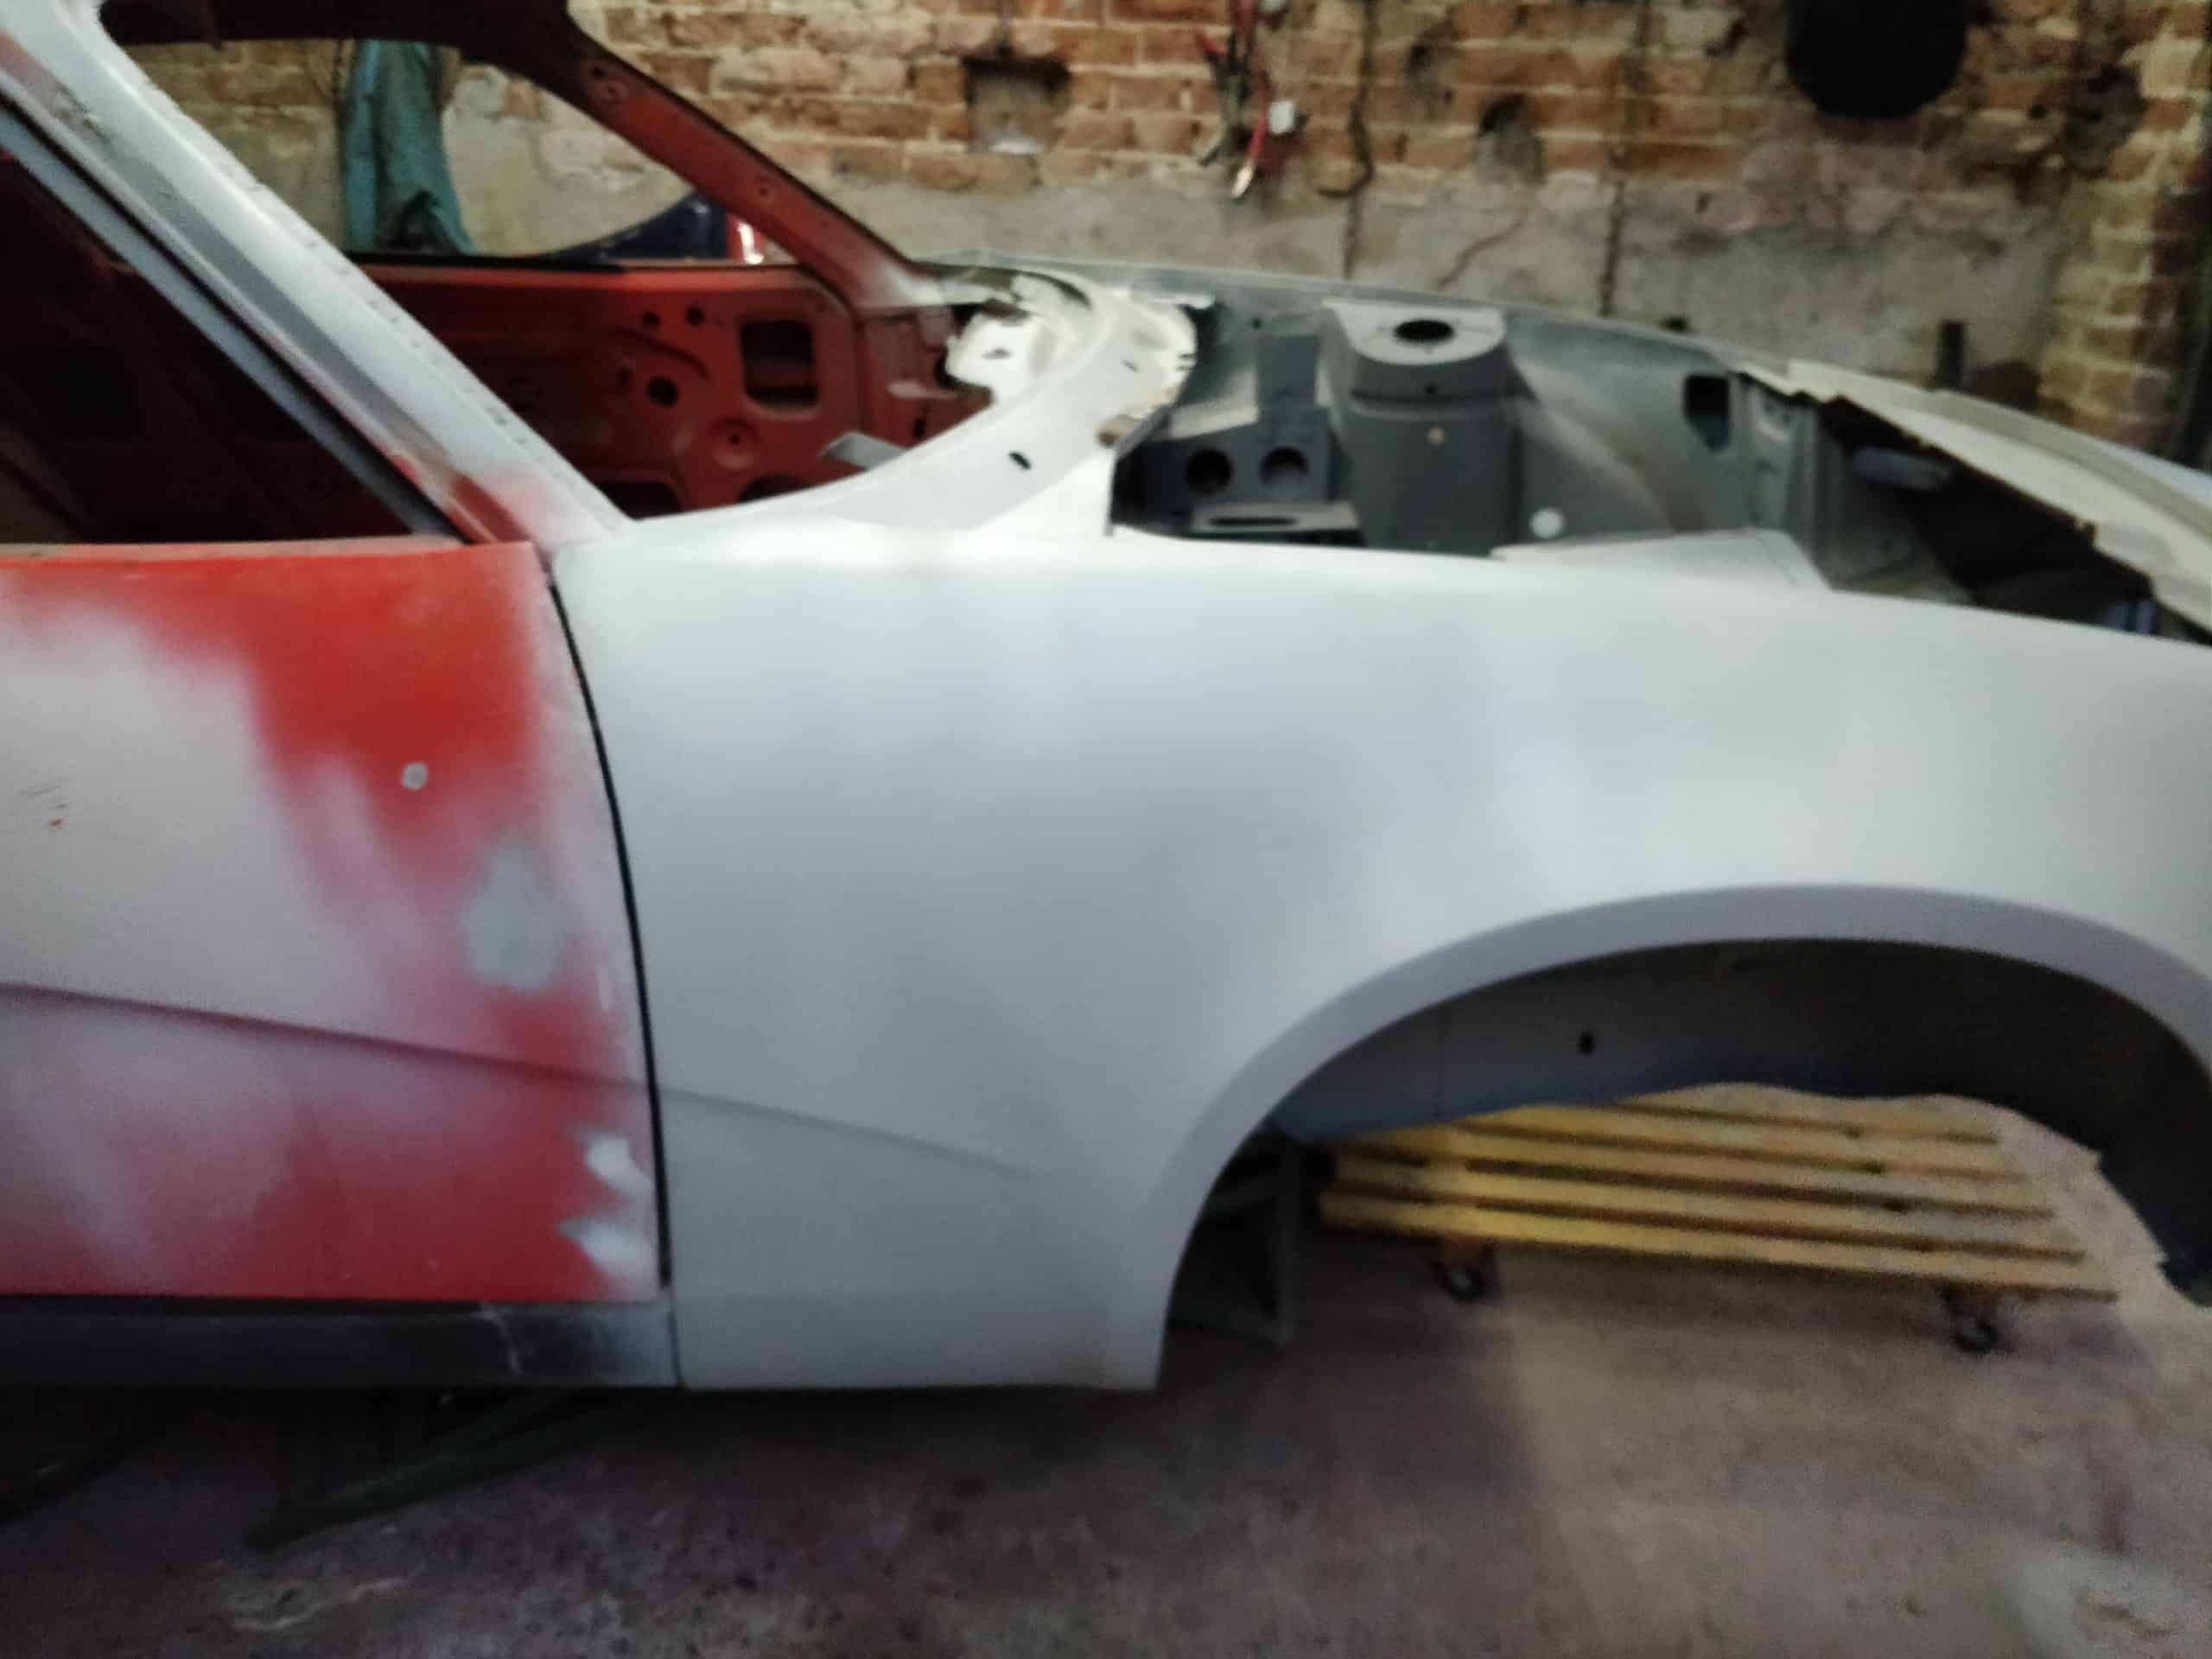
The first job was getting the rest of the paint off. The front panel had mostly been stripped already, but there was a strip at the back that needed removing. It took a while, mainly because the paint was three or four layers thick in places. A thick wire wheel on the angle grinder cut through all that, then I spent a good while rubbing back and treating the rust that had built up on the rest of the panel.
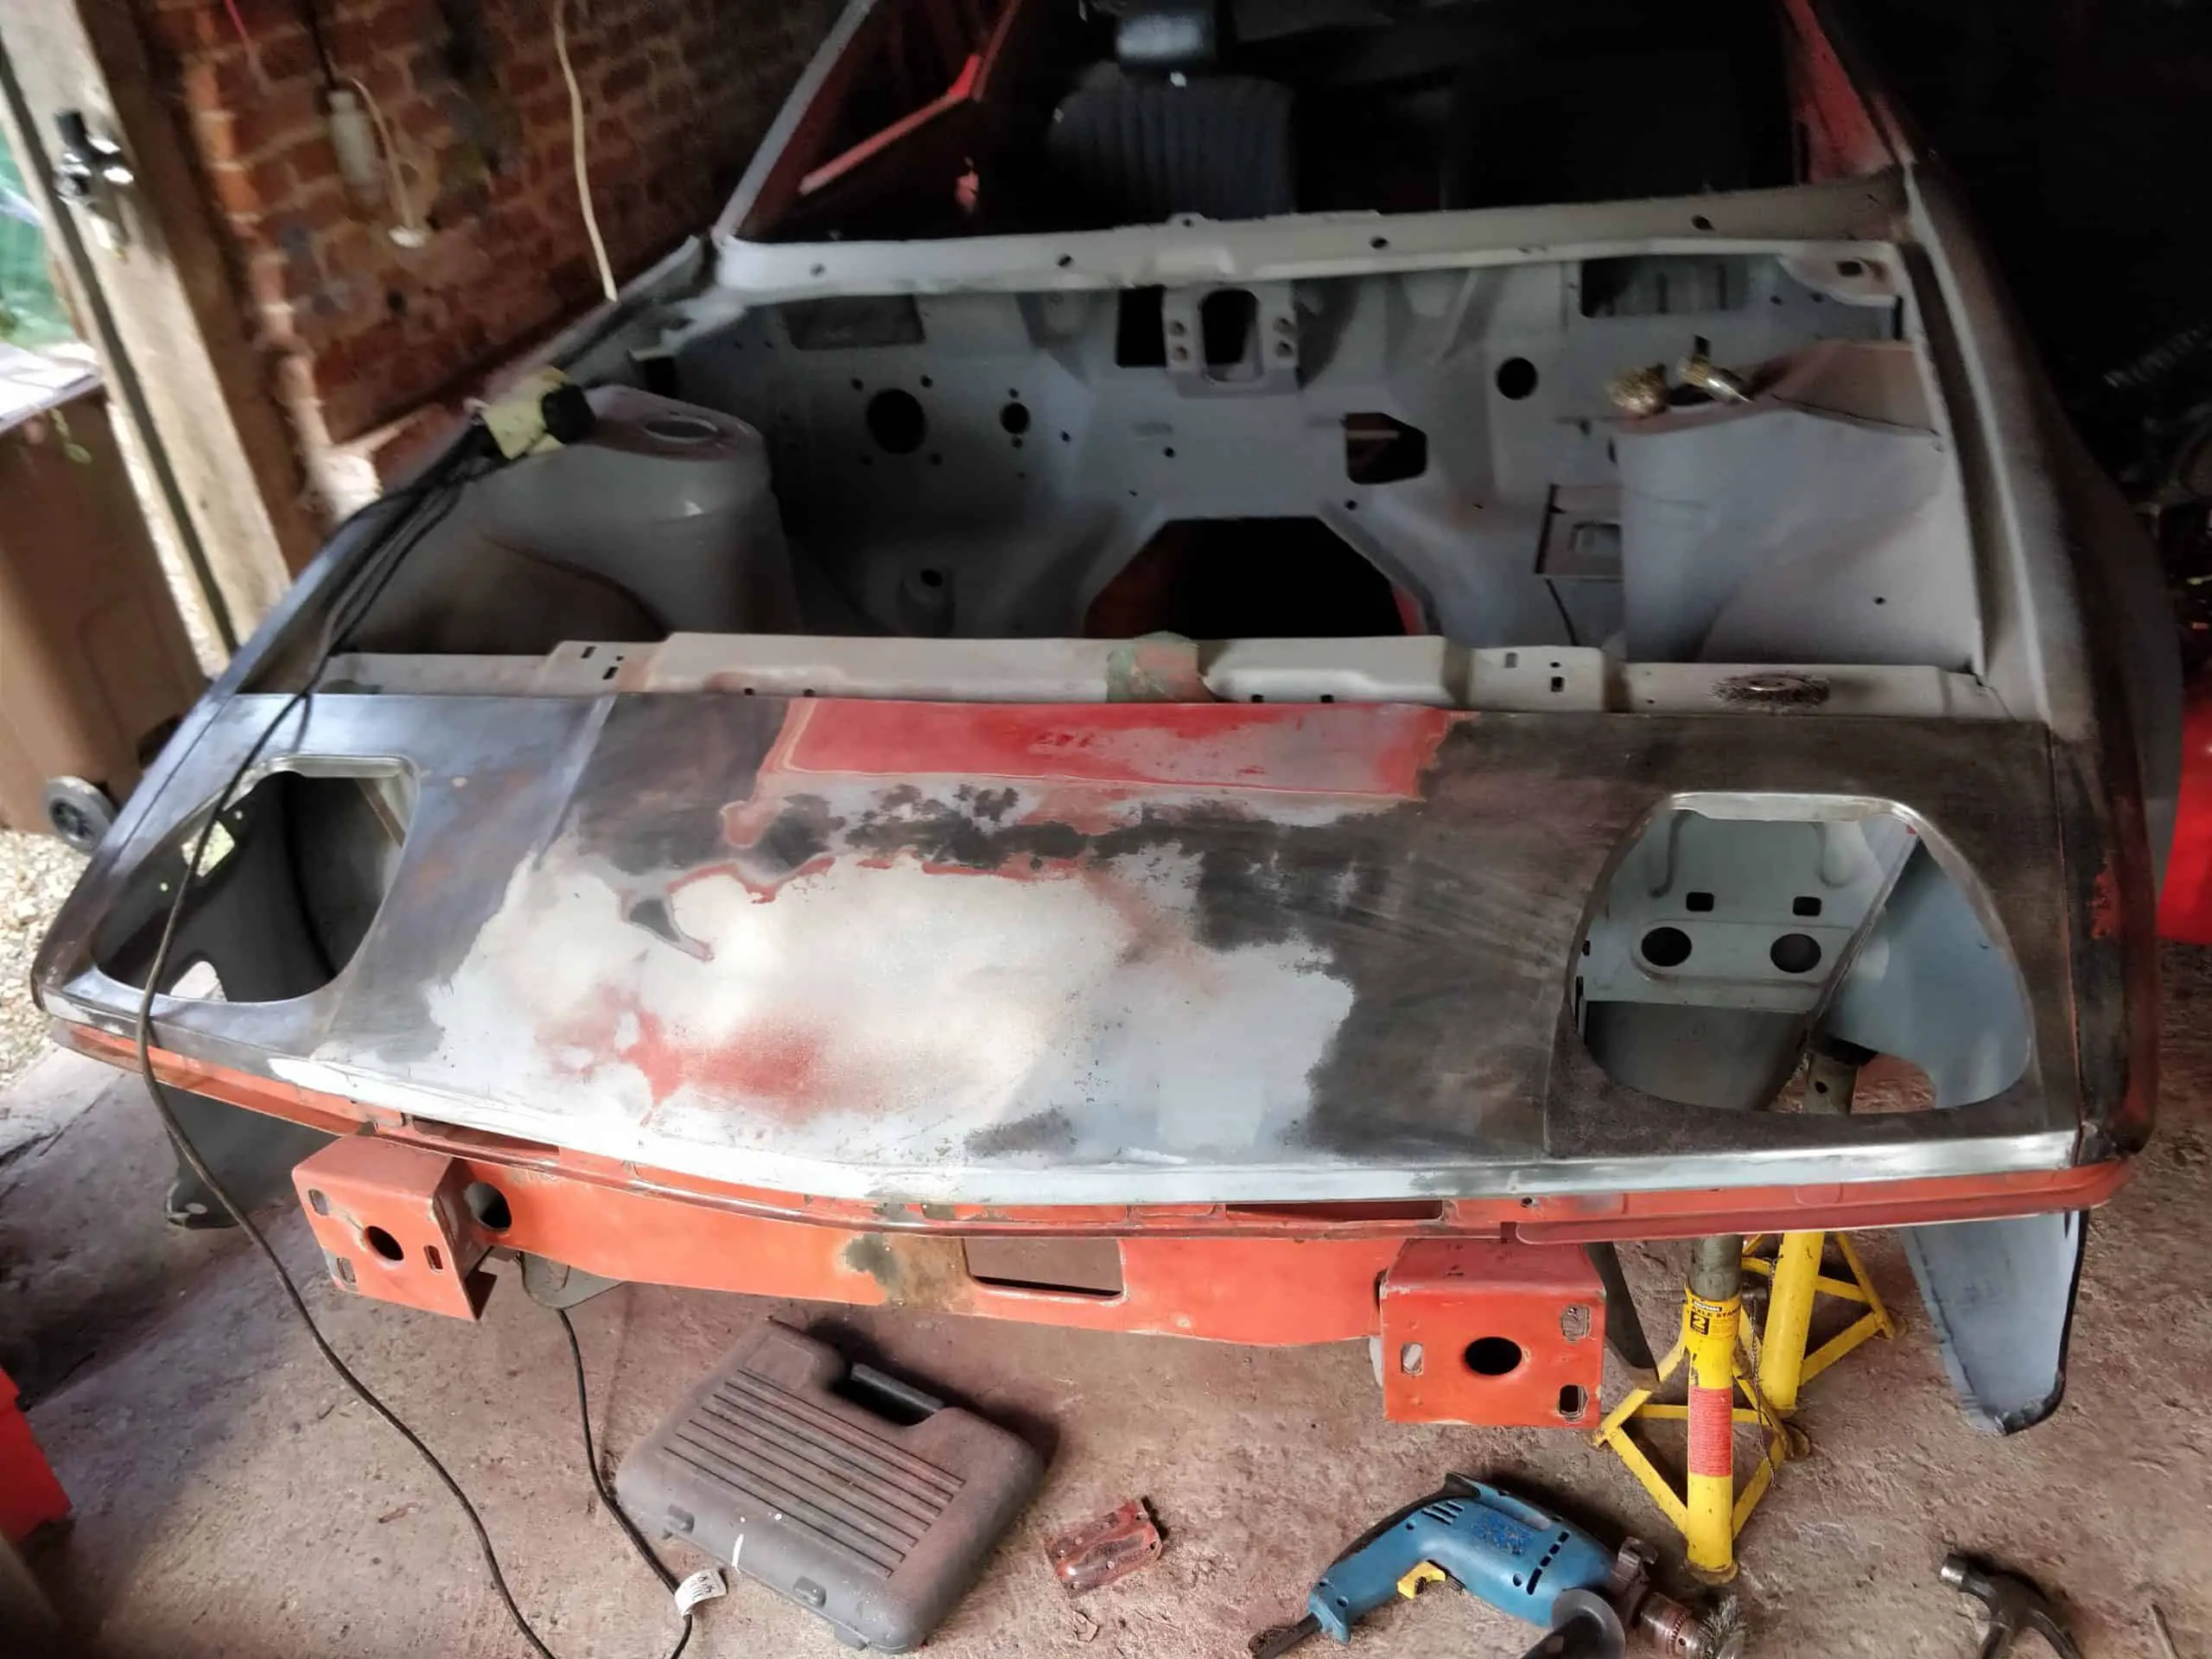

The wings, on the other hand, were a breeze; they only had a factory e-coat primer on them. I bought some poly abrasive wheels for a test, and they proved more than up to the task. I was happy enough with those that I decided I’d use those to do the rest of the car when it came to it.
With all that done, I got everything spotlessly clean and masked up; time for the primer!
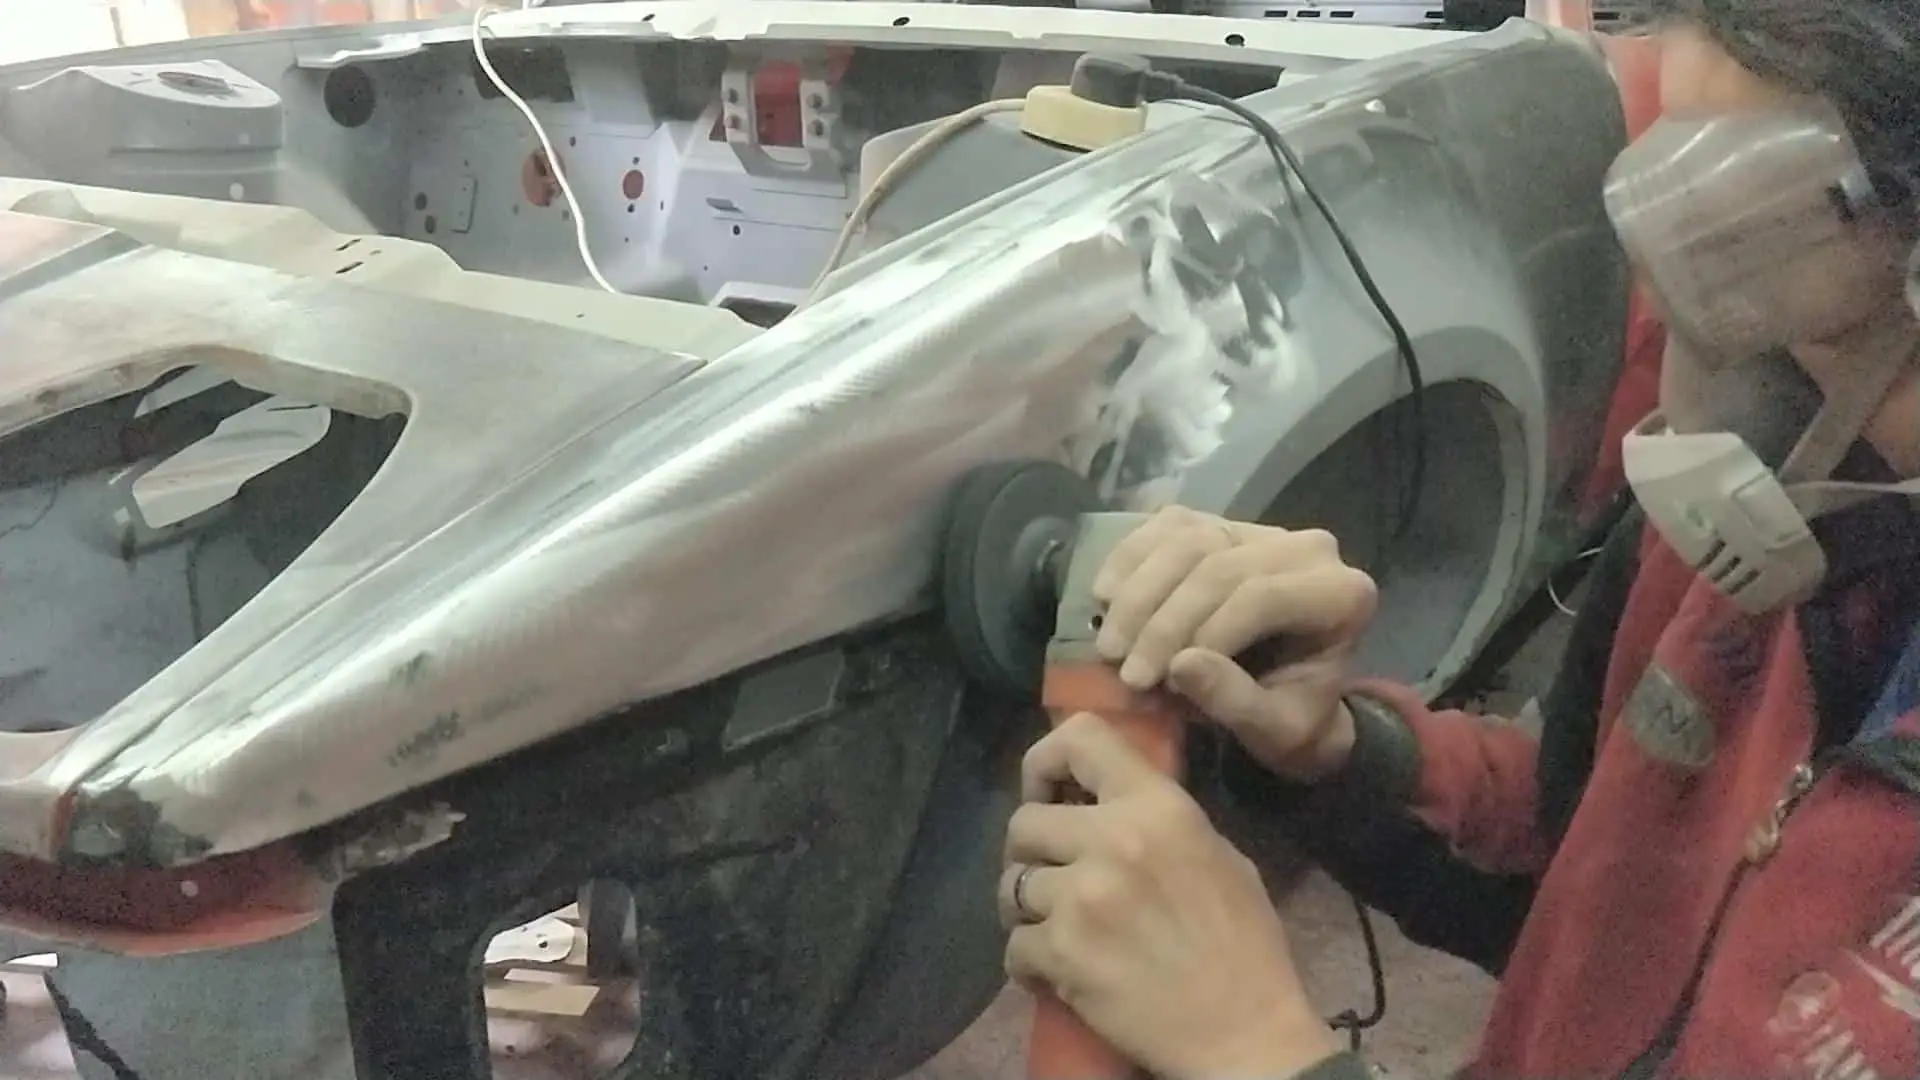
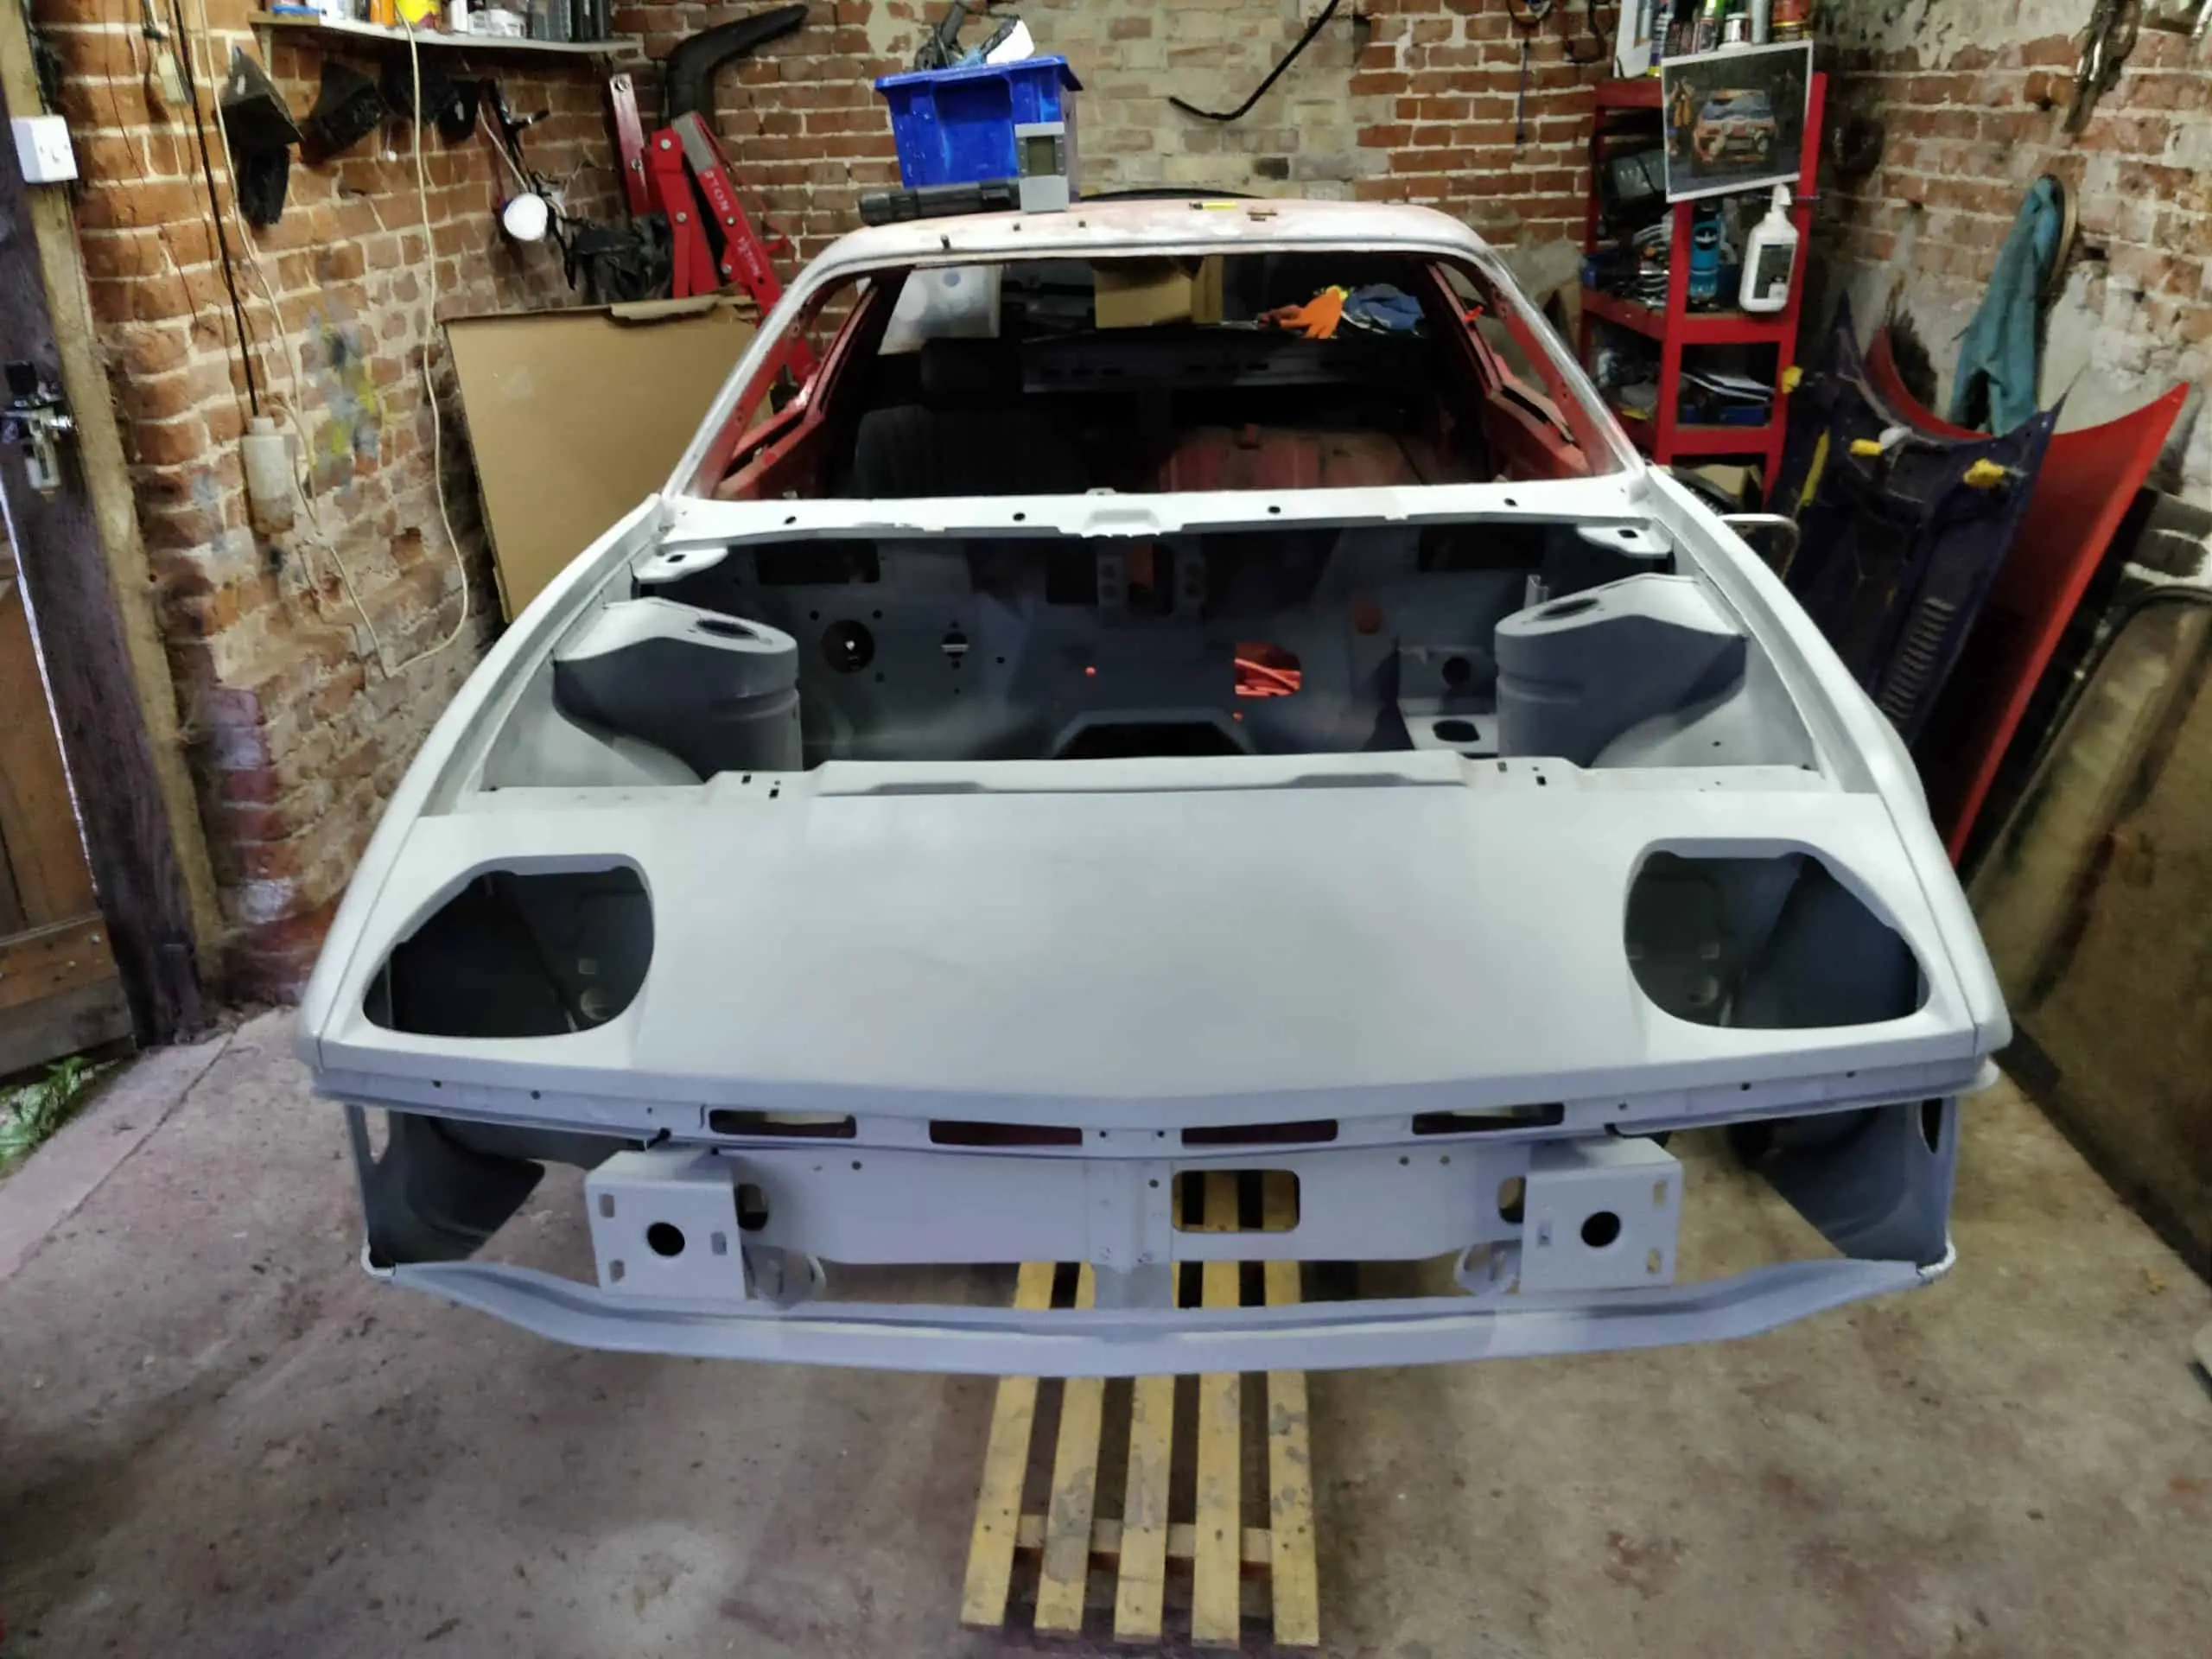
Priming the front end
With everything ready, I broke out the compressor again and went to work with the epoxy primer. I made sure to use enough thinner this time, and it came out a lot better. Still a little rough and ‘orange peel’ textured, but nothing that a bit of rubbing down wouldn’t sort out.
Coming up next…
Now the work is done on the front end – at least for now – the next job is to get the doors of and start on them. There is still a lot of work to be done on the front – mainly some filling in of dents and small imperfections, but my first priority is to strip all the paint off the rest of the car and get it primed with epoxy so I don’t have to worry about it rusting again.
And now the video!
So after a bit too much procrastination, I finally managed to get a video together and uploaded to YouTube. And here it is:
To be honest, I’m not overly happy with the video. There’s not much to show, really – it’s difficult to make ‘rubbing paintwork and a bit of rust repair’ interesting. Indeed, the footage I started with was about nine hours long, so the 30 minutes you see on the video is pretty much the highlights.
My plan is to get the rest of the bodywork done in two or three videos and not spend too much time on it – better to get through that to the more interesting stuff as I start to put the car back together!